Building a rack for a mountain bike is not a difficult task, especially when you have the right supplies available.
That said, we’ll start with the simplest DIY method to build a rack that will not only look good but also help you store your bike with ease.
Have a look:
Simple and Easy DIY Methods To Build A Bike Rack?
DIY Wooden Bike Rack
Things You Will Need
- Wood Pieces.
- A hand drill.
- Wood glue
- Different sizes of screws
- Paint
- Measuring tape
- Paint Spray
Instructions to Follow:
After gathering all the supplies, clear out sufficient space in your garage and follow the below-mentioned specs:
Step 1:
The very first step involves assembling the base of wood pieces. For that, take 36″ wood pieces and drill 1 ½” holes in them. Secondly, use the 2 ½” screws and wood glue to attach them to the side pieces so that you get a rectangular shape.
Step 2:
Similarly, you’ll now need to attach the base. For that purpose, drill 1 ½” pocket holes in the back wood pieces with a 36″ size. Utilize wood glue, flush, and 2 ½ screws to attach the back with the base.
Step 3:
Attaching cross support is necessary to maintain the stability of the whole structure. So, start drilling 1 ½” holes into 36″ cross wood pieces. Next, use wood glue and 2 ½” pocket screws to clamp and attach the cross pieces. Apart from that, you’ll also need to attach the top flush piece with the top of back pieces. For that, attach the 10 7/8″ middle brace from top piece to the bottom.
Step 4:
This step requires careful measurement. First of all, measure half an inch from one side of the base to the other. Take 2x2s wood pieces and attach them at the measured distance with the help of pilot holes and wood screws. Attach all the pieces one by one per the additional bike space.
Step 5:
You have finally made a wooden MTB rack, but it still needs some furnishing. This is where you’ll need the spray can and paint.
Step 6:
Choose any color you want and dilute the paint before spraying it. Use hand spray vertically and horizontally. Don’t forget to use the sheets beneath the bicycle rack to avoid any paint stains on the surface.
Step 7:
You can attach coat hangers on the top of the base to hang bicycle helmets as well, but it depends upon your priority.
Summary:
One of the easiest methods of creating an MTB rack is one we just discussed. Once you install the bike rack on your car, you can park two or even three MTB bikes at once.
On the other hand, the coat hangers will also come in handy as you can use them to hang the helmets.
DIY PVC Bike Rack Idea
PVC pipes are proving to be quite effective in different DIY projects, and we have used them to build an MTB rack, thus offering one of the best storage solutions.
You’ll need a handsaw, pipe cement, and PVC pipes with joints.
Make a base of two PVC pipes, followed by attaching eight different pipes from top to bottom depending upon the size of the wheel of your mountain bike.
Furnish the rack with paint, and you can place it anywhere you want to store up to 3 bikes without any hassle.
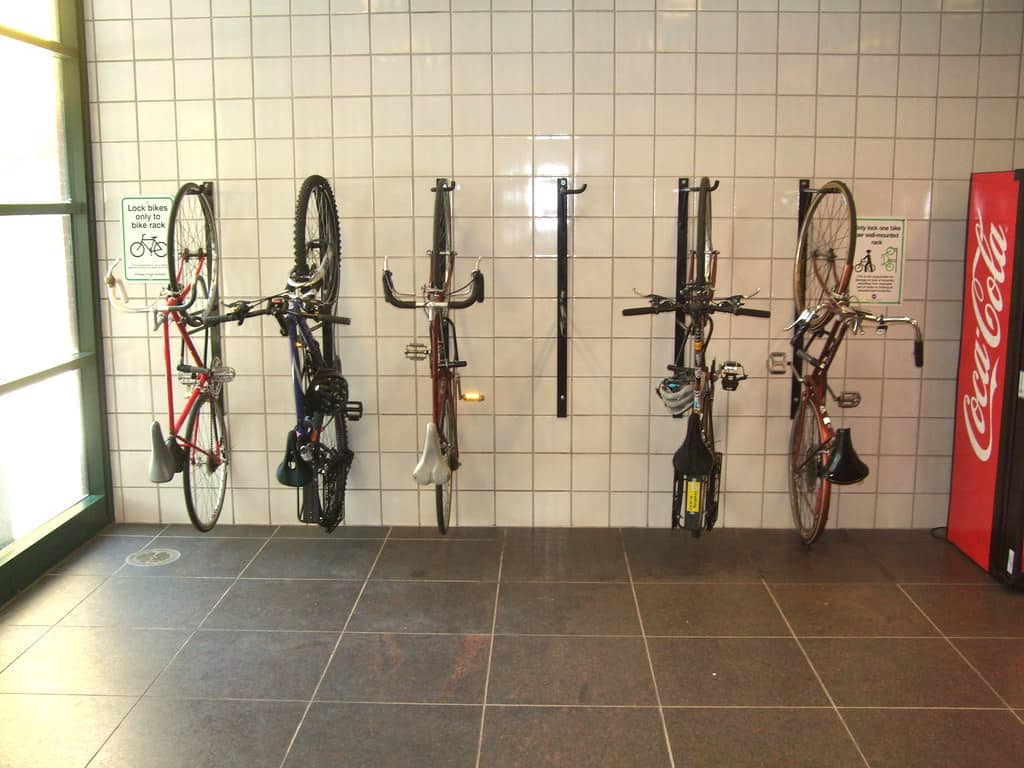
DIY Vertical Bike Rack
Vertical bike racks are used frequently in areas with only limited floor space to accommodate multiple MTB bikes at once.
You can easily get a vertical bike rack setup from a local bike shop and set it up on the wall using a hand drill, etc.
You can then store the front wheel of your bike in the tire hanger to let them stand vertically to save extra space in the room or garage.
Related: Choose Between Hitch and Trunk Racks
DIY Scrap Wood Bike Rack
With the use of scrapped wood pieces lying down in your garage, you can make a bike stand to store up to 4 bikes there.
Find all such wood pieces, and all you’ll need would be a handsaw along with screws, hand drill, and measuring tape.
Make sure that you measure the size of the bike’s tire first before getting started with placing the wood pieces close enough to each other.
Handlebar Bike Rack
Making a DIY handlebar bike rack is yet another interesting way of not only saving space but storing your MTB bike in a safe place.
For that purpose, you’ll need an extra handlebar that you can either take out from your old bike frame or get from online marketplaces.
Using the drill and a wood piece, you can mount the handlebar into the wall with sufficient height.
After mounting, place your bike between the handlebars horizontally, and you are good to go.
DIY Pallet Bike Rack
Got an extra shipping pallet at your home? Lean it against the wall and use it as a bike rack.
If you think the rack is not stable, drill holes on each side of the top piece and mount it to the wall accordingly.
Use it as a bike stand without any hassle afterward!
DIY Stand for Single Mountain Bike
You don’t need to make a large bike stand, especially if you have only one bike available at your disposal.
Just take a measurement of the front bike tire, leave that much space in a piece of wood using a handsaw and make a strong enough base beneath it.
It will keep your bike freestanding, and you’d be able to park it without wasting any time.
DIY Wall Mounted Bike Rack
Earlier, we discussed a handlebar bike stand, but it was only good for storing the bike. However, the idea of a wall-mounted bike rack is quite intriguing for many riders.
You can think of the rack as a shelf and add three hangers to it; one for the bike, one for hanging your helmet, and other bike gear.
Investing in a wall-mounted bike rack will require some effort and a good amount of supplies. However, once done, you’d be able to enjoy keeping your bike secure for many years to come.
Indoor Bike Rack (Ceiling-Mounted Bike Rack)
It’s a no-brainer to store bikes indoors because there isn’t much space available outdoors.
An interesting method to keep it indoors without creating any mess is to make a bike rack hanging from the ceiling.
Just like a ceiling fan, you can hang your bike this way and use it whenever you need.
Related: Thule Or Yakima Bike Racks In 2022
DIY Bike Wall Hanger Rack
Just like the handlebars method, you can try mounting sturdy and durable hangers on a blank wall to hang multiple bike accessories along with your bike.
You can utilize used bike parts, scraped wood, or order large hangers from an online marketplace to get started with the whole process.
People Also Ask:
Is it ok to hang bikes by their wheels?
Hanging bikes by their wheels are one of the most common parking methods. As far as the good or bad with this method is concerned, it will have no impact on your bike as you can keep the bike hanging for as long as you want without any worries.
Is it bad to hang a mountain bike upside down?
Normally, it’s ok to hang a mountain bike upside down, but there are exceptions for bikes that use hydraulic disc brakes.
In that case, you should avoid hanging them upside down as it can create air bubbles inside the cables that could impact the bike’s overall performance.
Are bike hooks bad for bikes?
If sturdy and durable, Bike hooks are not bad at all for the bikes. Well, if you mount cheap hooks on the wall, it can cause havoc as your bike may fall anytime soon with the inevitable damage.
Is it bad to store bikes vertically?
Storing bikes vertically is one effective way to utilize limited space indoors. However, if your bicycle has hydraulic brakes installed, avoid hanging it vertically, or else it will impact the performance of the brakes when you apply them.
How do you hang a bike without studs?
No studs? No worries! You’ll need a hook board that you can either order or make yourself depending upon your preferences and use to hang your bike with ease.
Final Takeaways:
There are so many methods of making bike racks available online, especially on YouTube.
The purpose of sharing these DIY ideas with you is to ensure that you build yourself a rack that does the job well and looks aesthetic and eye-catchy.
Follow the ideas we have mentioned above and try replicating them on your own to create a bike stand that can easily accommodate your Mountain Bike.


