Few things are as daunting as packing for a mountain biking trip. When you’re faced with all the equipment and think about how much space it will take up, well, there’s just not enough room in your car.
A good option is to pack your bike into a box and possibly ship it ahead of time.
We often pack our mountain bikes in boxes for air travel or shipping to keep them safe from any unforeseen damage that may happen at the airport.
They’re also ideal for moving your bike from point A to point B without a lot of hassle.
This is a little more complicated than carrying your bike by hand or putting it in a duffle bag but doesn’t have to be too difficult.
The first step is to know what goes in the box, and the second is how much space it takes up. The secret is to use a box that’s slightly larger and fill it with a lot of stuff.
All you need is your bike, of course.
How To Pack A Mountain Bike In A Box
Step 1: Disseminate the Bike
First off, remove the front wheel, seat, pedals, water bottle cage (optional), front brake from the handlebars, and then remove the handlebar grips.
Wrap them in newsprint or any soft paper you can find so they don’t get damaged.
Step 2: Wrap Parts
After this, take off your brake lever and anything else that might be loose or could cause shifting problems if it gets bumped around in transit.
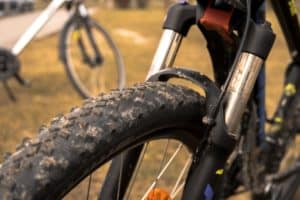
Be sure not to wrap anything around the fork or frame where you would have to get it out through those holes.
Step 3: Work on The Bike Frame
Time to get the frame out of the box. Untwist this and then carefully separate the headtube and fork from each other.
The head tube should be separated enough from the front wheel but will still be attached so you can re-join them later.
Take a look at what else you’ll need to pack in your box so that you know what to fill it up with.
Step 4: Pack the Pedals, Cables, and Levers
You’ll need your pedals plus any cables, quick release levers or strap locks, spare tubes, patches, etc. You’ll also need some form of pannier when carrying your bike.
Step 5: The Wheels and Tires
If you have a front and rear rack with a spare tire carrier, then you will be able to get your bike in the box without anything else really sticking out.
If not, however, you’ll need to use something else to hold your tires so that they don’t swing around in transit.
You can use a pair of old shoes or sandals tied with string or zip ties for this.
The other option is to use an alternative frame bag instead of using the rear rack but plan on having to strap the whole thing down so it doesn’t bounce around.
Then there are the shifters and brake levers. You can use zip ties to keep these levers from flapping around.
Make sure that you have a few extras in case you have to re-attach something as you fill the box up.
Step 6: Inspect Your Package
Now is the time to see just how much space your bike takes up. If it’s pretty much flat, then don’t bother packing anything around it.
If it has some elevation to it, however, then go ahead and find a couple of blankets or foam pads to lay on top of your frame and have them hold everything in place while you close the box.
Use enough padding so that nothing that is important will be rubbing against anything if it shifts during transit.
Still have questions? The video below should help you out.
The Bottom Line:
Use a bigger box so that you have more room to work with.
This means that you’ll probably need two for a road bike, and I’ve personally seen people use three boxes for a mountain bike plus an extra one just to be safe.
The last thing to do is pack your box really well.
You want it to be as secure as possible so that no matter how the bike shifts around on its way across the country, nothing is going to shift out of place.
That’s why foam pads are useful for keeping the bike from bouncing around in transit.
How to Pack the Bike for Shipping
The main thing that you need to pack in your box are big things like the water bottle cage, the seat, any pedals, and anything else that might get loose.
You can also pack a spare inner tube or two in case you have a flat during transit. Even though this may sound strange, try packing your bike using plastic grocery bags or anything else you might have around.
You should always make sure to wrap everything together so it doesn’t shift during transit as well. What this means is that the seat post goes through the frame instead of around it and so do both wheels on each side.
Also, you should use cardboard or something hard and sturdy in the box so that it doesn’t get caught up during transit.
Don’t pack a lot of empty space because it will jolt your bike around which can cause damage as well.
The nice thing about using an old bicycle box is that it’s already made for you so all you have to do is make sure that the bike fits inside.
When in doubt, it’s better to get a bigger box than a smaller one.
Other things to keep in mind are keeping tools and other loose items on one side of the bike if at all possible so they aren’t banging into anything during transit.
Then there’s the saddle and seat post, which should always be kept together tightly.
How to Pack the Bike for Air Travel
While there are a couple of ways you can do this, the easiest way is to use an old bike box.
The other option is to call up the shipping company and purchase a box that they sell to customers. This method requires that you pack the bike yourself.
Two things you’ll need before anything else is your bike, frame pump, all your tools, and a place to put your pedals. I say pedals because they usually get misplaced or lost during transit.
You’ll also need places for your water bottle and seat so you have some options for what might work out best in the end. You want something sturdy but with lots of space for gear storage if possible.
You might want to use a duffel bag or some kind of crate to keep your bike from banging around.
I’m not saying that this will happen, but it’s better to be safe than sorry and wrap your bike in something that will hold it still during the trip.
The next thing that you need is a box for your mountain bike in order to get it into the plane. It doesn’t have to be anything fancy, just a standard box with handles and wheels that you can push around.
You’ll also want one of those sturdy plastic bags so that you can close off the top. The best thing to use as the packing material is a newspaper or any other type of paper you happen to have on hand.
The main thing to do now is to get your bike into the box. You need to be gentle because you don’t want to damage the frame, but once it’s in there, you can lock everything down.
Don’t bother trying to put anything around the fork or front-wheel because they will just slide out if there’s any movement at all.
One more thing that you might want to do is tie down your bike by using a bungee cord around the handlebars and seat post of the bike.
You can also wrap some string around your water bottle cage or cranks so that it doesn’t move while in transit as well.
Packing Tips for Cubes, Pelican Cases, and other Luggage
Some people use these hard plastic cases that are designed to protect what they are holding in transit.
I’m a big fan of them when you plan on shipping a bike because it gives you more room to work with.
Another advantage is that if you use this type of case, then there’s no need to add anything around the frame or fork to keep everything from moving around in transit.
You can use a soft case just as easily as well if you want but be sure that the handlebars don’t get loose because they can hit the frame during transit causing damage.
How to Pack The Rear Derailleur
The rear derailleur on a mountain bike is designed to pivot so that it can follow the path of the chain, moving up and down.
However, this design also has its drawbacks. When the derailleur pivots, there is a chance that it will either slip out of gear or jam into another gear in an odd manner.
The good part about this design is that it’s easy to fix- just adjust the hanger by loosening two bolts on each side of the derailleur hanger.
Packing the rear derailleur in a box :
1. Place foam around the derailleur. You can use any type of packing foam, but you need to make sure that it is relatively thick in order to be effective.
The thicker the foam, the better it will cushion the derailleur itself. This is important because you want to avoid getting any scratches or chips on your bike during transport.
Generally speaking, packing tape is not as good as foam when it comes to protecting your bike during travel.
2. Wrap up your rear derailleur and place it in a box for shipping (or packing for air travel).
Make sure that you use a lot of packing tape, and that the tape is extremely sticky. Make sure that you wrap the foam as tightly as possible around your derailleur.
3. Place more packing foam around the rear derailleur. This will ensure that it does not get damaged during shipping or transport.
Now it is time to carefully cover your bike for air travel or shipping.
Make sure that you don’t pack anything else around the rear derailleur since this will likely cause scratches or damage to the vehicle itself, which will be bad for resale value particularly if you’re moving and hope to sell your bike later.
Final Words
To help make sure that your bike will arrive at its destination safely and soundly, you need to properly pack each piece of your bike before shipping it or flying with it.
This means not only wrapping it in bubble wrap and shipping blankets but also packing all of its loose parts like pedals, tires, wheels, handlebars, and seat into a box or plastic bag as well.
In conclusion, learning how to pack a mountain bike in a box is easy. Just follow the steps I’ve outlined here and you’ll have a perfectly secure box that will hold up well to any type of abuse or rough handling.