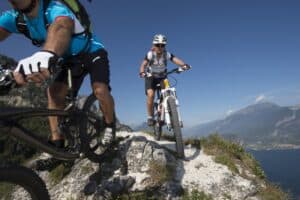
Contrary to what you have heard, a high-quality mountain bike doesn’t have to be expensive. You may be wondering, between building a mountain bike vs buying one, which will cost you more?
It depends, and you can also have a budget mountain bike build that will cost you less. If you are curious about how to build a custom mountain bike, we will show you step by step guide about getting it done.
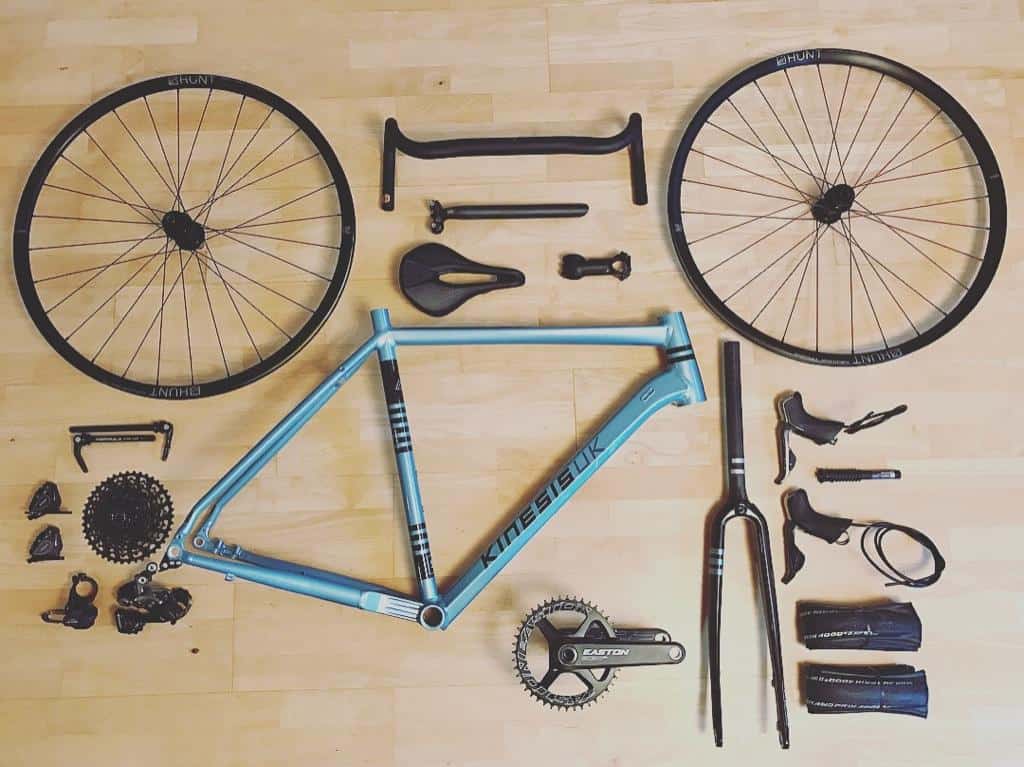
If you are also wondering what parts you need to build a mountain bike, we will mention all of them here.
Parts Needed:
- Frame
- Wheels
- Fork
- Handlebars
- Handlebar stem
- Crankset
- Bottom bracket
- Derailleurs
- Pedals
- Brakes
- Chain
- Saddle
- Brake adjustments
- Seat post
- Seat post clamp
- Seat
- Cassette
- Cables and housings
- Tires
- Grips
- Shifters
- Headset
Tools Needed:
- Pedal wrench
- Allen keys
- Bike grease
- Philips head a flathead screwdriver
- Bike pump
- Box cutter
- Cable cutters and shock pump
- Needle nose pliers
- Cassette lockring tool
- Bottom bracket tool
- Grease
- Chain tool
- Sandpaper
That must have been extensive, but those are the most important things to have before learning how to build a hardtail mountain bike, a full-suspension mountain bike, or a downhill bike.
There are plenty of pre-built bikes out there that their owners have joined by themselves. It’s a fun project that you can also take. Here are steps on how to build your bike.
How to Build Your Own Mountain Bike
Decide the Frame Size You Need
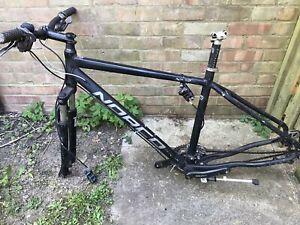
The first step to building your bike is deciding what size frame is perfect for your needs. Your riding style and your day-to-day needs play a crucial role.
Your height also matters. You can find height against bike size charts online. Make Google your friend! A carbon fiber frame costs more than an alloy frame.
Fix the Headset
Let’s assume you have already bought the frame of your choice, and you are on the next step to building your bike. You’ll need to install the headset.
A headset is import component of your bike. It’s the bearing that allows your bike’s steerer to rotate freely inside the frame’s head tube.
The headset ensures that the front wheel will move in the intended direction when you turn your handlebars.
Every twist and turn you make transmits through the headset. Get the right headset for your frame.
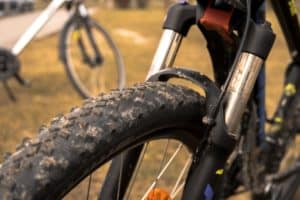
Fit the Fork
The front fork will hold your front wheel and act as a shock absorber. Set the crown race into the fork crown on top of the steerer tube.
In case the fork steerer is longer than you desired, cut it to the correct length. Use the bearing’s star nut to join the parts.
Tires to the Wheels
After successfully attaching the forks, the next step is the wheels. Start by ensuring your wheels have the rim tape around them. You shouldn’t be able to see the spoke caps.
Attach the wheels to the rim. If you are using tubeless, attach the nozzle first and the liners on the rim before the tires.
For the tube wheel option, put the tube inside and ensure only one side of the wheel is inside the rim. Slightly inflate the tube to prevent it from getting pinched.
Ensure the valve stem goes through the rim hole. Push the other side onto the rim and inflate to the recommended PSI.
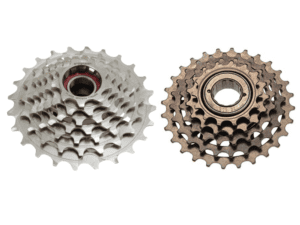
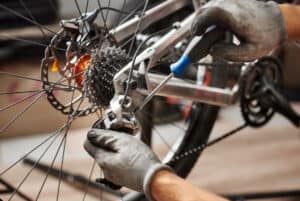
Attach the Cassette
You can keep the wheels rolling without the drivetrain. The cassette is a part of the drivetrain. It should be attached to the rear wheel. Put the cogs onto the cassette body of the wheel in the proper order—largest first and smallest last.
Grab the lock ring and put it on top. Tighten it using your hand. Use the cassette lockring tool and your wrench to tighten it until your cassette is tightly held on the wheel.
Install the Cockpit
The cockpit is an integral part of your bike. It includes the controllers, namely the shifters, brakes, and both grips.
Start by attaching the stem to the fork’s steer before the cap. Attach the handlebars to the stem, then insert the shifters from both ends of the handlebars. Install the brake triggers, and lastly, insert the grips.
Fit the Crankset, Derailleurs, and the Brake Caliper
The crankset must be attached to allow you to propel the bike. After fitting the bottom bracket on the bottom of the seat tube, fit in the crankset and attack the front derailleur on the seat tube.
Attach the rear derailleur to the hanger on the rear. On the front fork and the rear, fit the brake calipers. The caliper bracket must match the rotor. In most cases, the calipers come attached to the brake grips and filled with brake fluid.
Attach the Brake Disks
If you are using disk brakes, which most mountain bikes today use, now you can attach the rotors to the wheels.
Please don’t touch the braking surface with any oil as it decreases performance. Ensure the rotor is stuck in the right direction. There’s usually an arrow indicating the direction.
There are two types of rotors:
- Six bolt disks: Place this rotor on the holes and use your Allen key to tighten each bolt.
- Centerlock disks: Place the rotor onto the hub and tighten it with a lockring using a lockring tool.
Derailleur Hoses and Cables
The derailleur hoses and cables will need to be fitted to assist with effective shifting. Cut the to the correct length for your front and back derailleur. Once you fit the hoses, connect the cables from the shifters to the derailleurs.
Install the Wheels
Installing the wheels is an easy process. If your wheel is compatible with a quick release, push it through the hub and make sure not to lose the springs.
Line up the axle with the dropouts and tighten the quick release. If you are using a through axle, insert the axle through the hub and screw it into the frame.
Attach Chain
There are two methods of attaching your chain. You can use power links, which are the easier option, or chain breakers.
Final Touches
Finally, your bike is 99% complete. Install the saddle by sliding the seat post inside the seat tube, and tighten the seat clamp with your Allen key.
The next thing on the list is installing the pedals. Grease them on the threads and tighten them with an Allen key as well. Start tuning the derailleurs and the brake pads to ensure they are working in perfect order.
Hurray! You’ve just built your first bike.
What You Need to Do Next:
- Check if the bike is fine before riding.
- Ensure the tires are firm.
- Ensure the front derailleur is shifting correctly. If you are using 11 and 12 speeds, ignore this.
- Pedal the bike as you shift the rear derailleur to see if it’s moving correctly.
- Check if your bike brakes bolts are okay.
- Maintenance is also essential. Clean and inspect brakes regularly.
- Always wear a helmet before the ride.
Factors to Consider when Building your Bike
All bikes are not the same, and there’s a lot to consider before building one. To ensure that it suits your needs, ask yourself how and where you’ll be using the bike.
There are different disciplines of mountain bikes designed for different trails. Choosing whether your bike is cross-country, enduro, or downhill is the first step in building your ideal bike.
You should also consider your budget. Going for more affordable parts makes it easier to understand your bike. It’s advisable to start small and upgrade your parts as you improve your skills. Here what’s to consider when building your bike.
1. Cost
It’s often said that it’s cheaper to buy a complete bike than to build one from scratch. This might be true because bike manufacturers purchase parts in bulk and at a discount.
In other words, it means that it costs Canyon less to buy the forks and groupsets but will cost you more if you buy them yourself.
However, the market for used bikes is growing. With these cheaper deals, building up a frame with used components can be the more affordable option than buying a whole bike.
2. Get Guidance
Building a bike is not as complicated as computer programming, but it’s always important to seek an experienced rider’s advice when building yours. They can offer some helpful building tips that will help a lot.
Bike shops are the best place to start. You can talk to the mechanics and listen to what they have to say. Besides, bike shops will help you source used parts and connect you with fellow riders in the area.
3. Have a Mechanical Know-How
The technical challenge of building a mountain bike has shattered many cyclists’ dreams of attempting it. Buying a complete bike seems easier. What they don’t know is that building a bike is simple.
It takes patience, perseverance, and of course, the right tools for the job. We live in an era where you can find information easily, and anyone can figure out how to build their bikes through this type of information.
Alternatively, you can check YouTube tutorials to learn how to build a mountain bike. Some vloggers record every complete process as they assemble their bikes from scratch.
Our guide will also come in handy in helping you build your bike. In case you have any questions, you can ask us, and we will do our best to help.
4. Go for the Challenge!
Plan ahead and prepare your mind. Make a list and stay organized. Above all, set your mind right when approaching the whole process of building a bike.
You will encounter some challenges that might derail you from your mission, but it will be all worth it after your bike starts rolling.
In the end, you’ll not only understand and appreciate how bikes work, but you’ll have the technical know-how and the ins and outs of a bike. You’ll be able to understand the whole mountain bike concept when you are done building your bike.
The project may also build a strong connection with your machine, something like a strong bond. Building a bike is a huge milestone, and you should pat yourself or drink to it in celebration.
Many cyclists say that they developed a personal attachment with every bike they built, and all came with unforgettable experiences. If you have been looking to build a mountain bike, whether a full-suspension, enduro, or hardtail, there’s no better time to do it but now!
Frequently Asked Questions
Is it cheaper to build a mountain bike?
You have probably walked from store to store looking for an ideal bike with the parts you want, unable to find the perfect model. Your next thought was to build your own mountain bike from scratch, but will it be cheaper? That’s what most people wonder about before building bikes.
You are not alone, and many cyclists worldwide build and modify their bikes to their own suitability. But building a bike is not cheaper than buying a new bike. Purchasing the parts new will make building a bike very expensive.
Unless you know your way around and where to source parts cheaply or are patient enough to wait for the parts you are waiting to buy to go on sale or get discounted, you might be paying more to build your bike.
Alternatively, you can go for used items being sold by other cyclists upgrading or selling their bikes in bits.
Furthermore, even if you have your connections and can source cheap parts and tools, you’ll still require to buy some specialized tools that can’t just be found in an average toolbox.
If you are trying to avoid purchasing a high-end bike with a huge price tag, building one may be cheaper, but you’ll be spending a significant amount nevertheless.
How much does it cost to build a mountain bike?
Some people wonder how much it costs to get into mountain biking. It’s a beautiful world that you’ll be addicted to. Some also wonder what the cost of building a mountain bike is.
That, too, is an expensive affair. Prices for bikes, whether building new or pre-build one, varies with the level of components. Don’t be shocked to spend over $3,000 on bike parts alone.
There are many variables involved, and it also depends on how much prices have changed with time. Google your frame material and get to know the price of a complete bike in that frame. From there, you can get a rough idea of what it will cost you to build a mountain bike.
Some bike builders have shared their experience stating that it costs from $1000 to $1500 to build a bike. No matter how many times you build a bike, you’ll use different stems and parts.
Don’t forget to budget for the tools you’ll need. So, set your budget to $2000 to be on the safer side.
How easy is it to build a mountain bike?
Building a bike is easy for experienced builders. As you well know, nothing is easier for a first-timer. You may have all the tips, but you will have a hard time getting it done.
Some people are not technically minded to even repair a bike puncture or change the grips. There are also people whose curiosity leads them to build lovely bikes.
It’s easy to build a bike if you are a curious person that’s not afraid to make a mistake. You’ll need a few essential tools, someone to guide you, and the will to build a bike.
The only challenging part is sourcing the parts. You must know the bike stores in your area. Also, it’s essential to be on cycling forums in your city or social media pages where you can get good deals.
How long does it take to build a bike from scratch?
Bike shops say that it takes them a record 23 minutes to fully build a bike. That includes assembly, setting the brakes, gears, truing wheels, and the rest. It can take about 35 minutes to one hour to assemble a bike.
However, it depends on the bike you are assembling, the tools you have, and your experience level. It also depends on the build’s quality.
On average, a bike may take an hour to assemble, and an hour is not a lot because you enjoy every moment of it. It might take you weeks, months, or years to build a bike if you don’t have all the parts in one place.
My Last Remarks
Now you know how to build your own mountain bike. As challenging as it may look, it’s a simple process. Besides, you get to bond with your bike, and no one else understands its worth like you.
If you have any questions or require some assistance with building your bike, don’t hesitate to contact us. You can also visit your nearest bike shop for more advice and to source some parts.

Awesome article with lots of tips I used to build mine up!