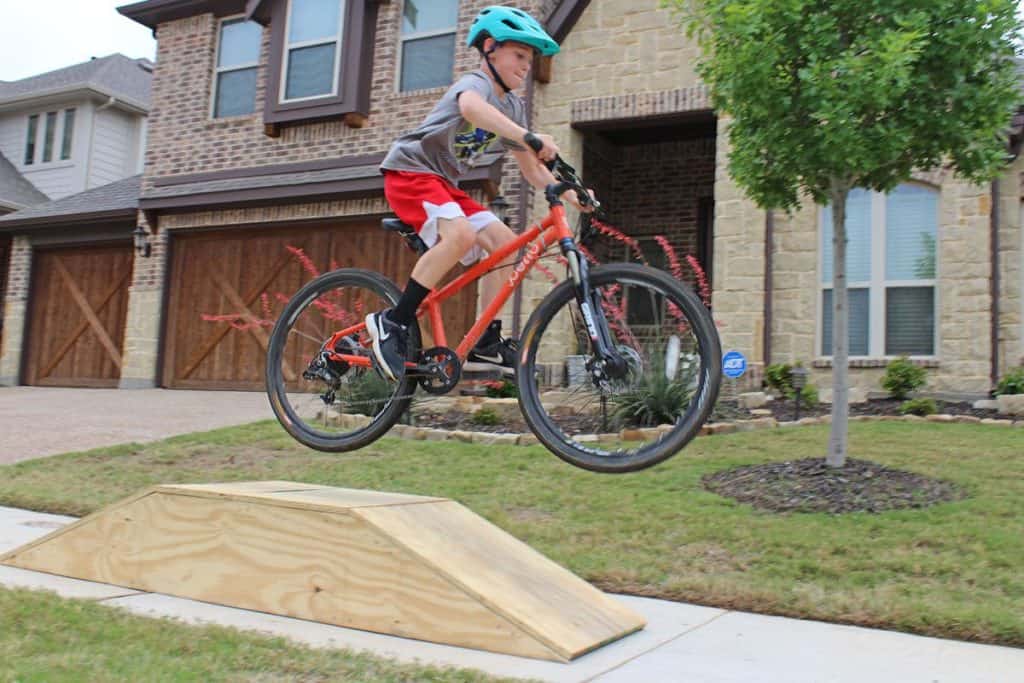
Whether it’s for a kid who wants to have more fun with their bike, or an adult who wants to practice jumps, bike ramps are an excellent way to practice with your bike.
And guess what, you don’t always have to spend hundreds of dollars on it. If you are on a tight budget, you can build one.
And it takes just five hours to do so. You can also make a ramp kicker for your mountain bike.
Below are the detailed steps for them, along with the materials needed.
How to Make a Bike Ramp
What You Need
You can quickly build a small bike ramp in your backyard or garage, although it usually depends on how much space you have.
It’s usually best to use wood to build your bike ramp. To properly build a small bike ramp, you need these materials:
- 3/8″ plywood sheet.
- Table saw.
- 2x4x10.
- Bits and drills for plot holes.
- Jigsaw.
- Driving screw.
After gathering the tools you need, follow the steps in this article to construct your bike ramp.
1. Make the Cross Beam Support
The first thing you need when constructing a bike ramp is to build the cross beam support. You should make three supports that all look identical. These beams would lock the vertical supports together to provide base support to the ramp’s deck.
To do this, you need to saw your 2x4x10 into two and make lengths of 24 inches until there are three beams. It would be best to have a backup support beam that is 23 inches in the distance for the edge on the bottom.
2. Cut the Vertical Supports
You also need three upright supports asides from the cross beam support. The supports are meant to have the exact measurements. Cut the wood into vertical supports with 24″ x12″ measures.
You should cut out three rectangles from the same plywood and draw a curve on one of the sides, which will be used as the bike ramp’s foundation.
Cut out the curve with a jigsaw by following the drawing. Follow the same procedure for the other two rectangles; remember you had three rectangles.
3. Cut Out Slots for Beam Support
It would be best to cut out the support slots now that you have identical erect supports and rectangular curves.
Find the top, middle, and bottom parts of the curve that you cut out to get this done. Then, draw out the cross beam to adequately take up the cross beam so that the three slots can adequately. Cut them out with the jigsaw.
Fit in the slots into your cross beams and adjust them if needed. The beams and vertical supports should fit each other perfectly to interlock. It ensures that you have a solid foundation. Take the 23″ support you cut before and put it at the back, with some space for the vertical supports.
4. Build the Ramp Deck
The cross beam and vertical support are meant to form the base of your DIY bike ramp. Once you have them, you can cut the deck of your ramp. The bike ramp deck should be 24″ wide and 26″ long. A table saw can be used for cutting it.
5. Construct a Base Plate
It’s essential to ensure that your bike ramp won’t move or shift whenever you ride your bike, especially since it’s a portable ramp.
The plate is meant to keep your bike ramp in place regardless. The base plate should be 24″ for the width and 34″ for the length. It should go up to 10″ further than the bike ramp.
6. Put the Parts Together
You have all the pieces needed to build your bike ramp: the beams, deck, vertical support, and base plate. The next step is to put the pieces together.
Look for a flat and tidy place to get this done. Connect the exterior part of the erect support to the underside of the crossbeam. Line up the supports with enough space. Use the screws to connect the vertical support to the cross beam.
Once you’ve done this, you need to put the parallel cross beam on top of the vertical support. You should also use screws for this to ensure they are well-connected.
Repeat this for all the beams, and ensure the entire assemblage is sturdy.
7. Attach the Ramp Deck
The second to the last step is to install the ramp deck and the plate to the ramp. Attach the ramp deck you cut before and line it up with the bike ramp frame. Make sure the backside of your deck is stable.
You can safely drill a hole through the deck and pass the beams. Connect the parts using a screw and ensure the deck has been well installed on the ramp frame. Use different screws to keep the deck stable after installing it.
8. Add the Base Plate
Finally, turn the bike ramp so the under face up and add the plate. The plate should be well-aligned to the structure to put in holes with a drill and use screws to connect them to the upright support and the under of the cross beam. Now, your bike ramp is ready.
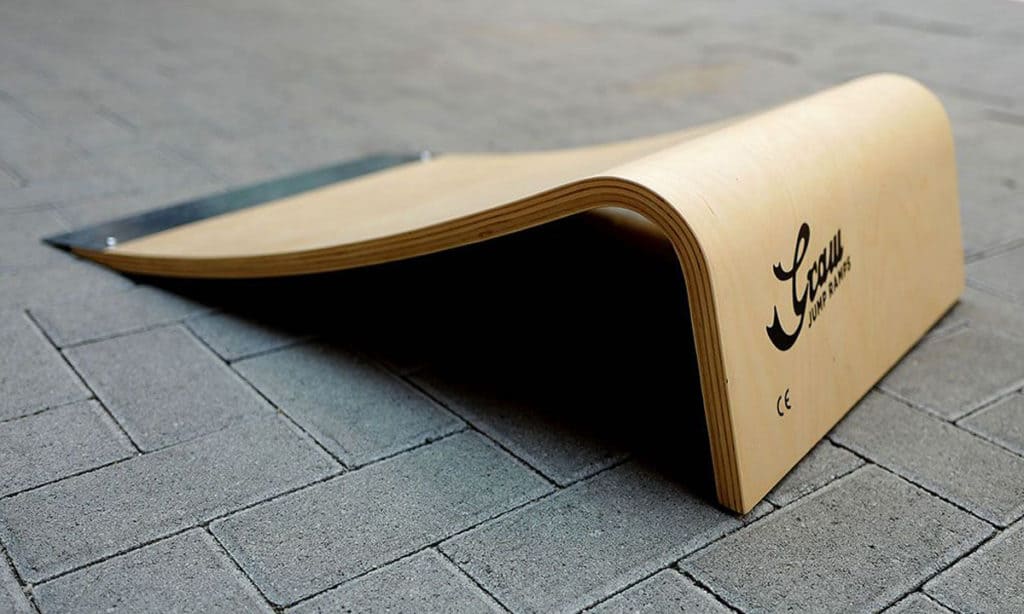
How to Build an MTB Kicker?
If you own a mountain bike, you might prefer to build a kicker ramp instead. A kicker ramp is like a normal ramp but a bit shorter, so you can jump off with your mountain bike or skateboard.
A mini kicker for your MTB is a great way to practice jumps and stunts. You can follow these steps to build one.
Materials You Need
- Two sheets of 18mm and 9mm plywood each.
- Between four and six lengths of 4×2 CLS timber.
- Screws.
- Hand saw.
- Tape measure.
- Marker pen.
- Drill.
- Jigsaw.
- Ball of string.
- Square.
1. Cut Out the Plywood
These steps are to make an MTB kicker ramp with a length of six feet, a height of 3 feet, and a radius of 8 feet.
To get started, tie your pen to a string that is eight feet long, and you’ll use this to mark on the plywood. With the 18mm plywood, measure 3 feet along with the height and 6 feet along the bottom, so it looks like a half rectangle.
On the place where you marked 3 feet, put the pen at the end of the line of your 6-foot mark, and ask someone else to hold the end of the string. Then, draw from the bottom of 6 feet mark to the top of the high spot, which is three feet, creating a curve.
Cut out the curve and use it as a template to cut another arc from the other sheet. The angle will be used on the ramp to drive up or down with your bike.
2. Cut the Timber
Now, you need to cut the 4×2 timber into lengths of 3 feet, which would determine how wide your ramp will be.
Then, you screw the wood between the two sides and connect it with the curve about 5 inches apart, making the ramp nice and stable. You need a few extra cuts of timber for the back of the ramp to stay steady and carry the weight of your mountain bike.
3. Put the Parts Together
Now, you need to cut the 9mm plywood into sections that would match the front of the ramp, which is curved. Lay the plywood on the braces and connect it to the 4×2 timber using screws. When measuring the plywood, keep the curve in mind.
Now, screw the top of the bike ramp together and work your way down, ensuring that it is flat and well-aligned. You can also trim any plywood sticking out of the ramp after putting it together. Now, you can test the ramp before using it for stunts.
Tips for Building a Bike Ramp
As long as you follow the steps in this guide to the latter, you can build a sturdy bike ramp for yourself or your kids that would support all the stunts and jumps that you want. Here are some tips to keep in mind:
Test the Ramp First
After building your ramp, it’s ideal to test it before using it. You need to ensure that the ramp is well-built and sturdy enough to take your weight before using it for your stunts and jumps.
You can test your ramp by wearing a helmet and other protective gear and driving your bike on it. After a few rides, you can figure out if the ramp needs any adjustments or not.
Wear Protective Gear
When building your bike ramp, it’s essential to protect yourself from hazards and damages. The protective gear you will need includes a helmet, gloves, and goggles in case of dust that might get into your eyes.
The helmet can keep your head safe from the wood, and when cutting the wood, you need gloves to protect your hands.
Build Based on the User
When building a bike ramp, you should do so with the person that would use it in mind. If you’re building a ramp for your child, check their riding abilities and weight, as this would determine how high it is and the thickness of your plywood.
If the person who will use the bike ramp is bigger or you’re planning to give the ramp some heavy-hitting, you should use thicker plywood for the vertical supports.
Don’t Build Permanently Without Permission.
Suppose you’re building a bike ramp, either for your regular bike or MTB. In that case, you shouldn’t make it permanently without getting your landowner’s clear and explicit permission or local trail organization.
The landowner will have to take responsibility if someone is injured because of the ramp. So, ask your landlord beforehand or build a typical bike ramp that you can put in the garage when it’s not in use.
FAQ
How high should a bike ramp be?
The bike ramp’s height should start between 1 and 1.5 inches for a bit of kid. Adults can use a bike ramp with a height of 8.5 to 11 inches with a width of 24 inches. If you’re confident about your biking skills, you can also decide to make the ramp a bit higher, going as high as 24 inches.
How tall should a kicker ramp be?
Kicker ramps are usually a bit smaller than standard bike ramps, and you can choose to make them as high as 6 feet long. If you go for this height, you should make the width about 4 feet, and it should be about a foot and a half tall.
What is the best angle for a bike ramp?
The best angle for a bike ramp is 45 degrees, as it gives you the most distance. Using a lower angle gives you less length and height for your jumps. But if the angle is steeper, you will have more height, but the distance will be lower, making it a bit more challenging to get the right jump.
How do you measure the radius on a bike ramp?
You can use a string and compass to measure the radius of a bike ramp. With a six-foot rope or string, you can trace the angle of the takeoff jump ramp. Tie the string to something heavy with your pencil about six feet away. Then, the pencil should line up with the two corners of your plywood to trace out the angle.
How do you bend plywood for a ramp?
To bend plywood, you can soak it in the water for about two hours until the plywood has softened. It might take a few more days for it to be soft enough to bend, so you should prep it before the day you build the ramp. If you’re not patient, you will crack the plywood instead.
Where else can you get a bike ramp?
You can decide to purchase a bike ramp if you don’t have the time to build one. Different biking stores offer the ramp for sale, although it’s a great experience to make one for yourself or your child.
Conclusion
Any biker who wants to move up in their cycling game, or a guardian that wants to help a child with biking stunts, would do better with a bike ramp for jumping. A bicycle ramp helps improve your handling skills balance on a bike, and it also makes the experience of riding a bike more fun.
Even if you’re not good with woodworking, you can still quickly build a bike ramp because it’s straightforward and requires very little skill. It is also easy to move your bike ramp from the garage to the backyard, but it is still durable.
With our complete guide on building a bike ramp, you can easily make a whole day out of it (remember to soak your plywood a few days prior) and start practising to learn new techniques and skills.