Wrapping your handlebars with new tape is pretty straightforward, although you will find different proposed ways and methods to get this done.
When wrapping handlebars on your bike, you need to remember that there should be no gaps to show the handlebar, and the tape shouldn’t be baggy.
With this considered, you can continue reading our complete guide below to learn how to replace handlebar tape.
What You Need
When wrapping your bars with new tape, you will need the following tools:
- New handlebar tape for road bikes.
- Electrical tape.
- Scissors.
- Solvent.
- Screwdriver.
The solvent is needed to clean the handlebars. Also, if you don’t have a screwdriver, you can use a mallet or Allen key instead.
Steps to Wrap Handlebars on Your Road And Mountain Bike
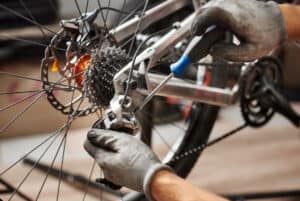
1. Remove the Old Tape and Prepare the Bike
The first step is to remove the old tape on your bike. You can do this by taking off the end plugs on the handlebar and moving the rubber housings by rolling them forward on the shifter levers. This would show you the tape underneath so you can remove it.
Now, you can peel the finishing tape located near the stem and, in doing so, remove the handlebar tape. Take the light solvent and clean off the sticky residue caused by the tape. Not all solvent is safe for use on carbon bars, so you should check them before using them.
In some cases, the residue is stubborn and hard to remove. You can get rid of them by scraping them with the blunt tip of a tire lever. Once you’ve cleared your handlebars off all residues, you can check them for any other dents and damage.
2. Start Wrapping the Handlebar
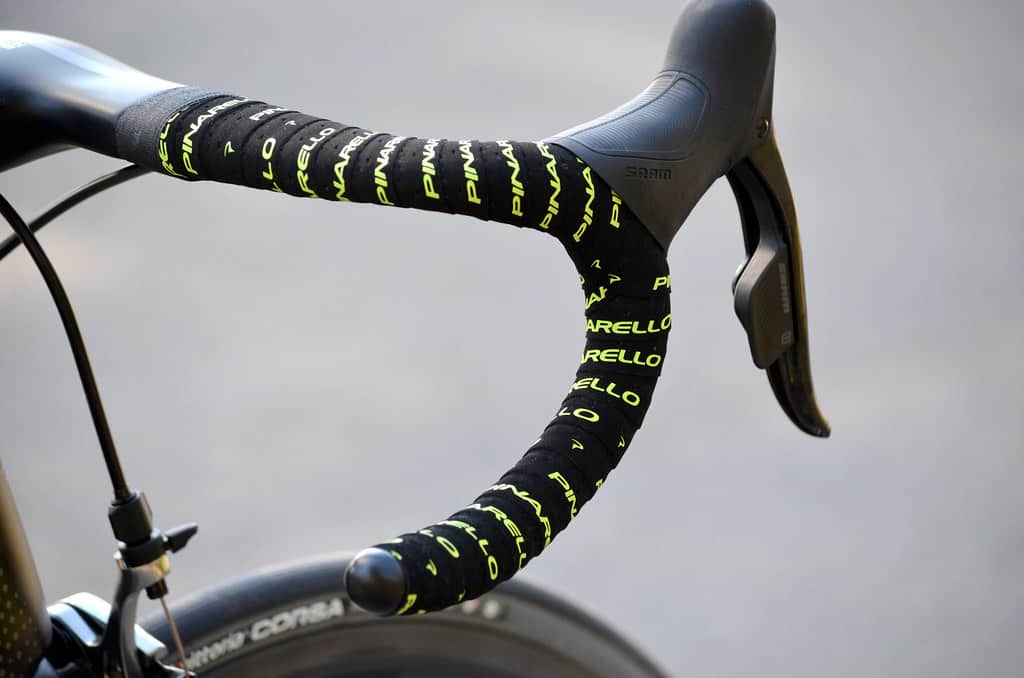
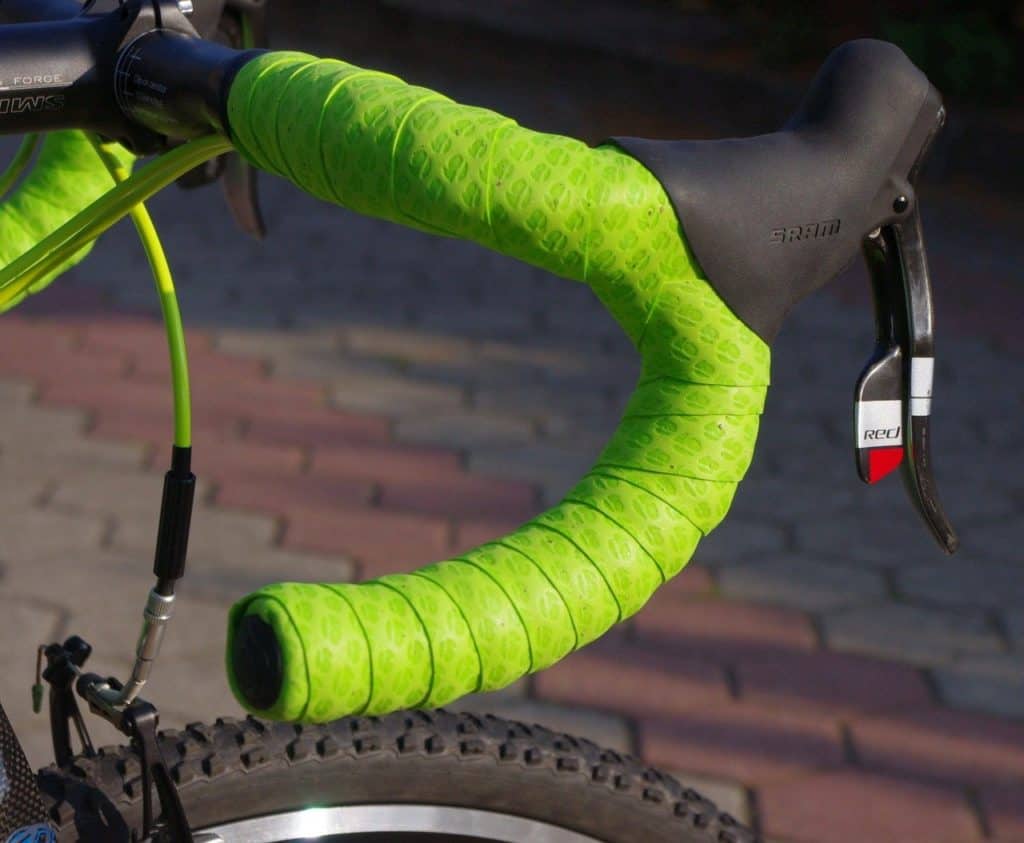
You can move on to wrapping your handlebar immediately it’s clean and ready. Start wrapping the bottom of the handlebar with the tape. Keep the tension, and wrap towards the direction away from the bar. By maintaining tension, you can achieve consistent thickness from the bottom to the top of the bar where the brake lever is.
Some handlebar tapes come with chamfered edges, giving you a particular level of overlap without increasing the thickness. So, you’ll have to overlap the bars more intentionally to make the handlebar wrap thicker.
3. Use the Cheater Piece
When you purchase your handlebar tape, you might notice two small sections of tape left. These are called cheater pieces and are provided if you have a small gap on your handlebar after wrapping. In most cases, you end up with gaps when wrapping the tape around the brake levers.
It’s much better to use the cheater pieces than get the original tape to cover the bike levers. So, you can hold them behind the levers and wrap them by going over the top. Look out for handlebar tapes with cheater pieces so you don’t end up with an exposed brake lever.
Related: Stepwise Guide To Raise Your MTBs Handlebars
4. Cut the End
Calculate where you want the tape to finish and how far from the stem it would be when finishing up. A good spot is where the handlebars protrude to fit the step, as placing it too close to the step will lead to awkward cable routing.
When you decide the spot and you’re done wrapping the bar, you should cut the tape while leaving a small piece of tape left. This way, you can wrap the remaining piece of tape on top of the bar so you get a smooth edge.
5. Secure the Tape and Finish
Handlebar tape can still come loose after wrapping it, so you need to secure it in place. This is where the electrical tape comes in. Some handlebar tapes also come with a finishing tape that you can use to secure the bar tape.
With your bar tape in place, you can add the finishing touches. Put the lever covers back on the handlebar. The tape will come with new end plugs for your bar, so put those rather than the old ones. You should also replace the cover of the hoods. Now, you can get started with your road bike’s new handlebar tape.
Helpful Tips For Correctly Wrapping Handlebars
You might have to let go of the tape in the middle of your wrapping process. If this happens, you lose the tension and end up with loose tape. Get some straps to hold it in place to fix this. You can easily get these at your local mechanic’s shop.
After removing the old tape and cleaning it with solvent, you should use that opportunity to inspect your handlebar. This is the only way to know if it’s damaged and you need a good one. If you use aluminum bars and haven’t checked them in a few years, chances are they have reached their fatigue life. There’s a chance of corrosion as well.
To prevent your handlebar tape from slipping off later, double-check when wrapping to see if the adhesive part of the tape is actually sticking to the bar and not just the tape.
How to Choose A New Handlebar Tape
Grip
Handlebar tape is the main point of contact from your hands to your bike, so there’s no doubt that you need one that provides enough grip when handling your bike. This is even more important if you ride without gloves. The tape should also provide grip during wet riding conditions.
Looks
You also have to think about the handlebar tape’s look and the kind of design you want. You can decide to match the color with your head tube or saddle, but regardless, you should choose whichever you like best.
Related: Remove Rust From Your Bike’s Handlebars
Padding
It’s also good to look out for bar tape with a bit of padding or thickness. This will provide cushioning and comfort on your hands, especially on rougher terrains, so choose a suitable tape depending on your riding style.
Accessories
Finally, consider whether the handlebar tape has some accessories that you might need. These include the cheater tape, which will come in handy at the end of the wrapping process, and the finishing tape, so you don’t have to spend on electrical tape.
Why Tape Your Handlebars In The First Place?
You might be wondering why your handlebars come taped and why you need to keep on replacing the tape on them.
Well, handlebar tape gives you cushioning for your hands, making riding your bike more comfortable. It reduces the vibrations that go from the road to your arms. Some cyclists prefer to use double the tape for extra cushioning, especially if riding on rough roads more.
Why Should You Replace Handlebar Tape
For one, you should replace your handlebar tape as a standard form of maintenance, the same way you might have to replace chains, tires, and gears regularly. Replace it at least once a year, although it depends on how much you ride.
There are a few other reasons why you might have to replace the handlebar tape on your road bike. If you crashed while riding your bike and the handlebar has scuffs on them, you might prefer to replace the tape so it looks better.
Also, you might not like the tape that came with it, especially if it’s a dull color. In this case, all you need to do is wrap it with colored tape.
If you want to sell your bike, that’s another good reason to replace the tape. It would look used, and putting new tape goes a very long way in making a bike look better.
Regardless of the reason, it’s an excellent idea to learn how to wrap your road bike’s handlebars, especially if you’re an avid biker. It also gives you the chance to check on the condition of your bars.
FAQ
Can I Use Duct Tape on Handlebars?
If you’re looking for a low-cost alternative way to wrap your road bike’s handlebars, you can use duct tape. Duct tape works similarly to handlebar tape; it has a good grip and is way more affordable than standard bar tape.
Can You Use Electrical Tape for Bike Handlebars?
You can’t use electrical tape for your bike handlebars, but it is the best tape for securing bar tape when you don’t have finishing tape. It’s recommended to use electric tape over your bar tape to finish it, although you can do without it by purchasing handlebar tape that comes with extra tape.
How Do You Wrap a Bar Tape without Tape or Adhesive?
Bar tape without adhesive is usually stretchy, so wrap it snugly around the bar with enough overlapping and secure it with finishing tape. Some bikers prefer to purchase handlebar tape without adhesive, so it doesn’t leave the sticky residue when it’s removed. It’s also good for practice since you can remove it and put it back repeatedly.
How Do You Wrap Handlebars With Bar End Shifters?
Road bikes with bar-end shifters require more attention when wrapping their handlebars. Start by inspecting the shift levers and brakes to ensure they are correctly installed. Then you can cover the bar end shifter with insulation tapes to keep it firm, then wrap the handlebar over it as explained in the guide.
How Do You Finish Bar Tape?
The best way to finish bar tape is with the finishing tape that usually comes with it. If you don’t have this, you can use electrical tape to finish it instead or purchase handlebar finishing tape separately.
Which Way Do You Wrap Bar Tape?
The best way to wrap bar tape is by following a clockwise fashion from the inside out on the handlebars. Overlap the tape by a quarter while keeping it even to ensure thickness and evenness. Next up, tighten the grip of the tape on your hands.
Can I Reuse Bar Tape?
You can reuse bar tape only if the adhesive on the tape has not lost its stickiness. If you use bar tape without adhesive, it becomes easier to reuse it, although this means that you’re not adding anything new to the design of your bike. It’s still advisable to buy a new one.
Conclusion
Now that you know how to wrap handlebar tape on your road bike, you can get started with replacing the old one now.
Keep all the factors explored in this guide in mind, choose the suitable tape, and ensure it is secured rightly. Once you’ve done that, don’t forget to replace it again after one year.