Wondering how to raise your mountain bike’s handlebars? Then, you are in the right place.
Raising the handlebars of a mountain bike is possible with some primary tools. Moreover, raising the handlebar requires loosening the bolts and securing them back with the help of a wrench or an Allen key.
But, there’s more!
We have devised a complete step-by-step guide for mountain bike enthusiasts to make sure that they can easily raise the handlebars of their bicycles.
Have a look without any further ado:
Raising Your MTBs Handlebars The Right Way
Tools You’ll Need
- A set of Allen keys or a multi-tool
- A torque wrench or key, especially if you have a Carbon bike.
Adjusting the Handlebars Height on a Mountain Bike
Before starting the whole process, the first step is to determine what type of mountain bike you have got.
That’s because not every bike will have the same handlebar, and you might need to go on with some extra tweaks while raising them.
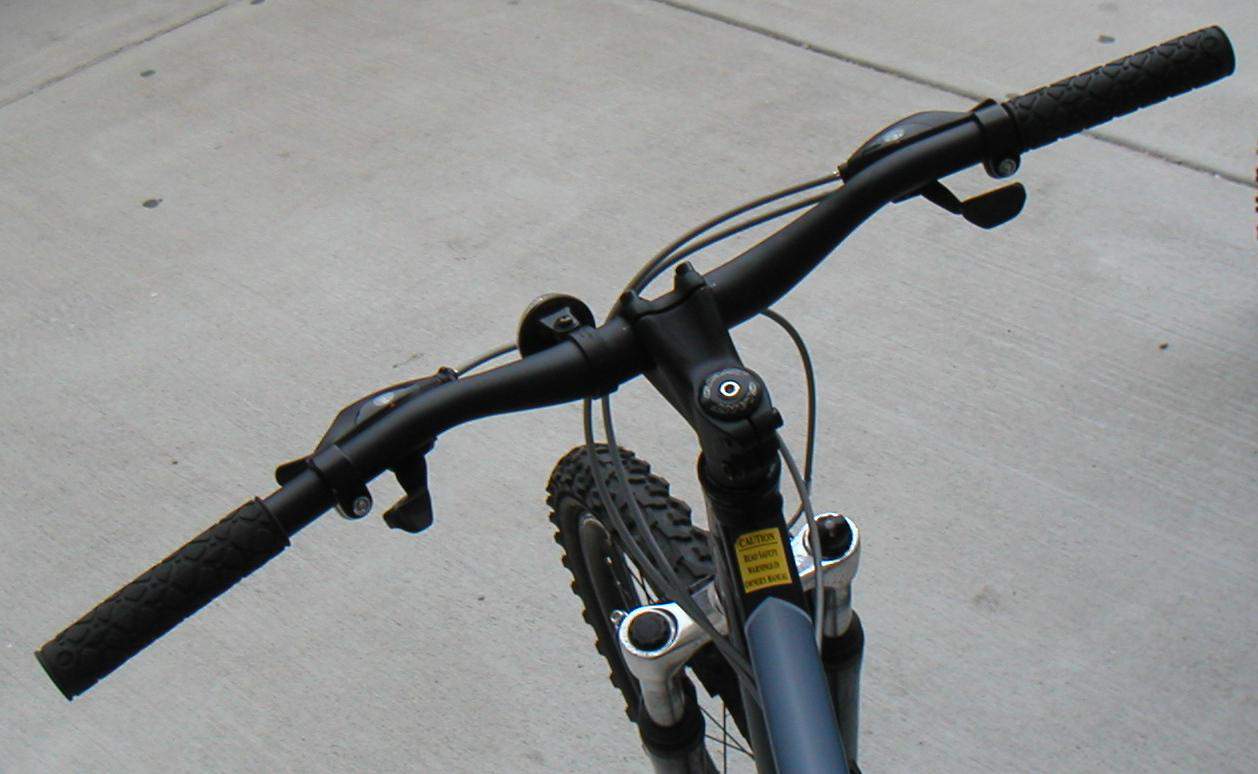
Anyways, as the guide revolves around fixing the height of handlebars in general, we’d assume that your mountain bike comes with a flat handlebar.
Why? Well, most MTB bikes these days consist of flat handlebars as they offer more versatility and stability at the same time.
Moreover, flat handlebars are light in weight and compact, thus reducing the extra burden on the rider while cruising a steep uphill or a road terrain.
Once you know the type of handlebar your MTB bike possesses, now’s the time to see whether it has a threadless headset stem or a threaded one.
A threadless handlebar stem, in short, does not contain a threaded top headset race, nor does it use the threaded steerer tube.
Threaded headset stem is rather common in almost every mountain bike. It consists of the external threading on the top of the fork. Meanwhile, the bearing cups are pressed into the bike head tube in a threaded headset stem.
Based on whether your bike consists of a threadless or a threaded headset stem, follow the guidelines of raising the handlebars below:
Related: How To Remove Rust From Bike Handlebars
Adjusting the Handlebars of a Threadless Mountain Bike?
Step 1:
Obtain the Allen key and use it for removing a long bolt from the stem cap. For those who don’t know, the bike’s stem is the L-shaped metal piece that keeps the handlebars attached to the rest of the mountain bike.
Step 2:
Next, keep both Allen key and long bolt in a safe place as you’ll need them again.
Step 3:
Use Allen key again, but this time you’ll use it for loosening the smaller bolts on a threadless headset stem.
Ensure that you keep the smaller bolts somewhere safe to avoid any problem.
Step 4:
Pull out the handlebars completely off the stem with care and complete focus. Never try to pull them out in a hurry, or else you will bend the shape of the handlebars. In doing so, you won’t put them back into the stem easily.
Step 5:
Add spacers to the main tube of your bike. You can also remove the spacers from the main tube if you want to lower the height of the handlebars.
Step 6:
Replace the stem and the stem cap manually but with care. Do not overstress the alignment of the stem, as you can easily adjust it later on.
Step 7:
Similarly, to check whether you have replaced the stem and stem cap properly, move the handlebars freely. And if they move perfectly, you have replaced the stem ideally.
However, if the handlebars do not move freely, you should loosen them until they do not cause any resistance in moving.
Summary:
By adding the spacers, you can easily elevate a mountain bike’s handlebars that come with a threadless stem.
You can also remove the spacers from the stem if you want to lower down the perfect height of the handlebars.
Next, we’ll move back to discussing the handlebars elevation for a threaded headset system.
Raising the Handlebars on a Threaded Mountain Bike?
Adjusting handlebars on a threaded headset stem does not require any extra effort. You will need a bike wrench for loosening and tightening the stem,
Step 1:
Take the wrench and start loosening the top bolt on the threaded headset stem.
Step 2:
Similarly, loosen the locknut of the stem with the help of the wrench.
Step 3:
Pull out the stem from the mountain bike freely.
Step 4:
Keep the right handlebar adjustment in your mind, as you’ll have to align it with complete focus.
Step 5:
After adjusting the handlebar height, reattach the stem and tighten it with the wrench accordingly.
Summary:
Mountain bikes with threaded headset stems are easy to elevate. Make sure that you use a wrench to loosen the large bolt on the stem.
Keep the correct position of the handlebar in mind, as in many cases, you will need to lower it down to make it aligned with the bike’s saddle.
Why You Might Need to Adjust Your Handlebars?
Although many bikers don’t prefer adjusting the handlebars on their mountain bikes, you might still need them as per your preferences.
One of the major reasons you’ll need to adjust the height of the handlebars is to find out the best cycling position.
Other than that, riders often tweak with the handlebar adjustment to keep themselves at comfort and convenience while riding their way uphill or downhill.
Regardless of these two reasons, some other factors include:
Growth of a Child or Teenager
As the child grows in height with time, he will face comfort issues while riding the same mountain bike repeatedly.
To accommodate the child’s growth or a teenager’s, you may need to adjust the handlebar’s height.
So, make sure that you tweak the bike of your sons or daughters after every six months or a year to offer them a perfect riding position with comfort and convenience.
As a Gift
You may want to gift the mountain bike to your children or relatives.
In that case, you’ll surely need to adjust the handlebars on the bike before re-gifting it to some other person.
To Improve Visibility
Visibility is of paramount importance, especially when talking about modern mountain bikes.
That said, mountain bikes usually have lowered handlebars to increase comfort and distribute the weight of the rider in a balanced way.
But in doing so, the riders may face distorted visibility along with the chances of getting hunched over.
If that’s the case, you should elevate the handlebars of your bike to ensure perfect visibility while you ride on different terrains.
To Ensure Comfort
Comfort and convenience are some of the reasons you should think about elevating or lowering down the handlebars of your bike. But that alone won’t be enough. We also recommend wrapping the handlebars with tape.
If you feel uncomfortable while cycling, you should tweak the handlebar adjustment to get a perfect riding position and enjoy the comfort accordingly. As for taping, it provides you a better grip and ensures you do not end up with blisters and wounds.
To Avoid Injuries
Injuries are common when we talk about mountain biking.
You can avoid neck pain, cramps, getting hunched over, pulling your hamstring, or extra stress on your calf muscles by adjusting the handlebar’s height.
We will recommend getting it tweaked every once in a while to make sure that you reduce the likelihood of getting injured.
Improved Bicycle Performance and Maintenance
Last but not least, to get improved performance from the bike and keep it maintained daily, you may need to adjust its handlebars every once in a while.
It will ensure not only a comfortable biking experience, but you’ll also be able to get the best out of your MTB bike accordingly.
How To Find the Perfect Handlebar Adjustment?
Finding the perfect handlebar adjustment for your mountain bike is not as difficult as you might think.
First of all, it would be better to replace the word ‘perfect’ with ‘alignment.’
In that sense, it’s a standard rule that the height of your handlebars on a mountain bike should be aligned with the rest of your bike.
In other words, the bike’s stem, regardless of whether it’s threaded or threadless, should be aligned with the bike’s front wheel.
One way of checking the alignment of the handlebar is to stand between the bike frame with both your legs while you adjust the centerpiece of the bike.
The centerpiece, in short, must be aligned with the front wheel, and this way, you can enjoy a comfortable biking experience.
Apart from these standard rules, you must know that there isn’t any hard and fast rule to find the perfect handlebar adjustment.
What we recommend is to keep testing the adjustment of handlebars until you find a comfortable position that will help you ride your mountain bike with ease and convenience.
If you do not adjust the height of the handlebars, it might result in injuries and put you in danger, no matter if you are wearing an MTB helmet or other accessories.
To summarize all that, while elevating the height of the handlebars, keep the following things in your mind:
Let your body guide the height of the handlebars. Adjust them naturally. Practically adjust the height while keeping the alignment factor in mind.
If you don’t achieve the perfect adjustment, follow the steps we have mentioned again and again until you hit the sweet spot.
How Wide Should My Mountain Bike Handlebars Be?
Just like the height of the handlebars, there is no hard and fast rule about how wide a mountain bike’s handlebars should be.
However, we can still study the width of the handlebars and how they impact the overall riding experience.
First things first, you need to know what type of bike you are getting before deciding on the width of the handlebars.
MTB bikes have usually evolved from road bikes with narrower handlebars. The narrow width of the handlebar allows the riders to move quickly at a fast pace and adds a comfortable, aerodynamic position.
Contrary to that, bikes with wider handlebars are suitable for riders interested in dirt biking. Such handlebars offer extra bike control and maneuverability, which suits the demands of bikers riding steep trails.
Regardless of the width of the handlebars of a mountain bike, it all comes down to your personal preference as well.
If you are used to riding bikes with a narrower handlebar, we won’t suggest you shift towards wider handlebars suddenly.
Location is also of prime importance while considering the width of the handlebars. For instance, a tree-filled area is more suitable for bikes with narrower handlebars, as you might not only get better control but can keep yourself away from extra obstacles.
Meanwhile, if you want to ride on a flat trail, choosing a bike with wider handlebars would be an ideal option there.
Besides all that, you must also consider the type of body you have got before deciding whether to get a bike with wider handlebars or not.
Based on that, you should keep the following things in mind:
- Consider your body’s type before making the final decision.
- Decide the primary purpose of the handlebar first.
- Check whether you are okay with shifting to a new width rather than going with consistency.
- Finally, check the location of the trail you’d be riding and make your decision accordingly.

How to Find the Perfect Sized Handlebars for Your Bike?
First, the best way to find the perfectly sized handlebars for your bike is to visit a local bike shop and get help from a bike expert there.
It will allow you to make a sound and wise decision.
However, there are two other factors to keep in mind if you don’t want to consult a bike expert:
- The Handlebar Rise
- Handlebar Sweep
Handlebar Rise and Its Impact
The rise of a handlebar is defined as the difference between the center of the bar and its stem that attaches to the body of the bike.
Although mountain bikes with flat handlebars usually have no rise, there are exceptions for tall riders.
If you are taller than normal and you think that the lower rise won’t help you out, it would be better for you to get a mountain bike with a raised handlebar.
Also, raised handlebars are appropriate for downhill riding as they offer improved control to the rider.
Handlebar Sweep
The sweep of the handlebar could be measured in two ways, i.e.
- Through Upsweep and
- Through backsweep
Upsweep is one of the vertical handlebar angles that have been measured through the grip. Although upsweep has no impact on the height of the bar, it may have to deal with the overall comfort of the rider.
Backsweep, on the other hand, is the measurement of the angle formed by the backward curvature of the handlebar.
With that being said, if you only want to upgrade the handlebars of your bike, you should keep the following standard diameters of handlebars in mind:
- 4mm
- 8mm
- 35mm
You can choose either of the diameters while upgrading the handlebars of your mountain bike.
Other than that, you can also replace the stem and the handlebars on your bike, but it will certainly cost you a little bit extra.
Final Takeaways
Raising the handlebars on your mountain bike depends upon whether you are enjoying your ride or not.
You may want to elevate the handlebars, especially if you feel uncomfortable or if your visibility is compromised.
Similarly, you can also adjust the alignment of the handlebars on your own by following the steps that we have mentioned above.
Before you do anything, check whether the headset stem of your MTB bike is threaded or not. Then, either use the Allen Key or a wrench to loosen the bolts on the stem and then raise the height of the handlebars accordingly.
In the end, do not overstress yourself if you cannot find the proper position of the handlebars. Instead, keep practicing adjusting the height, and you’ll eventually find the sweet spot that will help you ride better.


