When it feels like the rear derailleur of your mountain bike isn’t shifting the gears like it’s supposed to be, you should think about replacing it.
The question that arises here is that “How to Install a Rear Derailleur on a Mountain Bike?” and we are here to answer it.
Installation of a rear derailleur is not an impossible job, especially if you have the right bike tools available at your disposal.
The whole process involves removing the chain and old derailleur, replacing it with a new derailleur, and then tucking the chain back in.
We will demonstrate each and every step of installing a rear derailleur, but before that, you need to have the know-how of some basic things.
Let’s have a look, without any further ado:
Types of Derailleurs
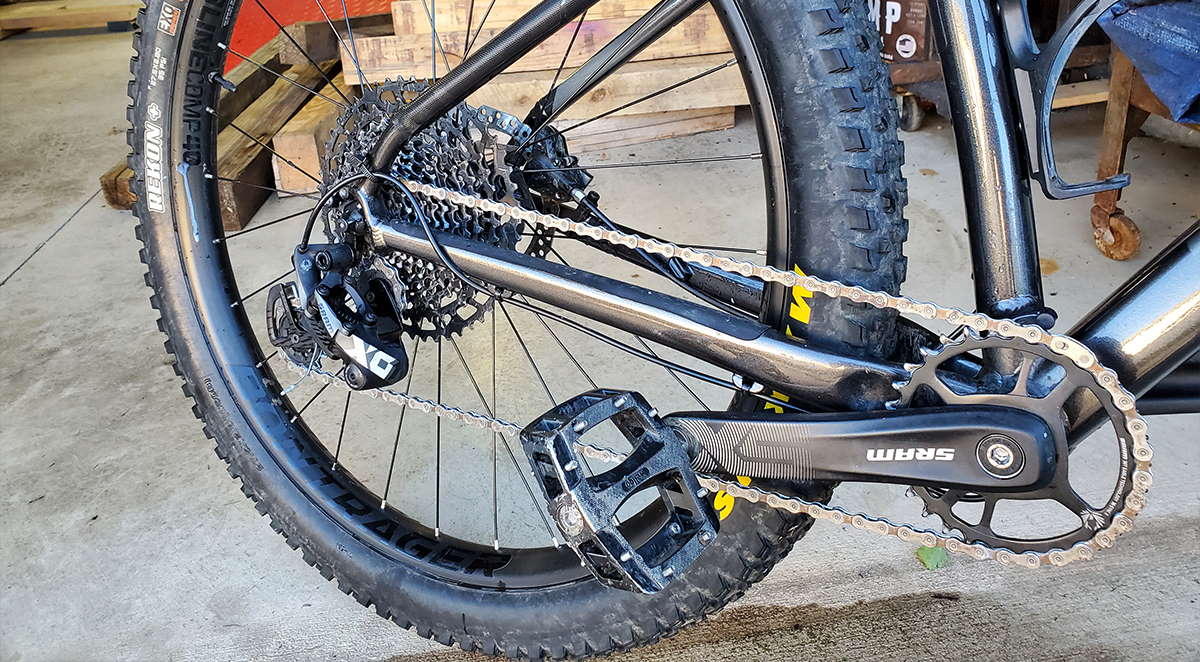
We see two primary derailleurs present in an MTB bike; the one being a rear one and the other being the front derailleur.
Our focus would be on the rear derailleur as we are going to replace it.
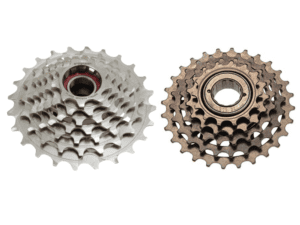
When it comes to the rear derailleur, there are three different types available such as:
Standard Type: The standard or traditional derailleur is mostly present in old mountain bikes. Whenever the cable tension is released, this type of derailleur shifts the chain to a smaller cog and allows the rider to change the gear accordingly.
Low-Normal Derailleur: A low-normal derailleur, on the other hand, works with the same mechanism, but the chain when shifts, gets adjusted into a backward or higher direction.
Electric Derailleur: Such derailleurs are powered by batteries and are mostly found in e-bikes.
Also Read: How to adjust front derailleurs
Checking the Derailleurs Regularly
Keeping a bike maintained will simply do you wonders as you’ll enjoy a longer lifespan on different parts such as the suspension system as well as the derailleurs.
Checking on the derailleurs simply means that you inspect them regularly before you take on a ride.
See whether it’s making any noise while you shift the gear and if it does, simply adjust it again.
Similarly, your mountain bike derailleur could not be performing ideally if you face the following problems:
- The chain comes off often.
- You face issues in shifting the gears.
- The derailleur cage is rubbing against the crankarm.
- The chain isn’t sliding smoothly in the sprockets of the derailleur.
- If your derailleur is causing any of the above-mentioned problems, you will need to replace it as soon as possible.
In case if you are lazy enough, you could face the following problem with the rear derailleur:
What Causes a Rear Derailleur to Break?
Not taking enough care of the derailleur will not only cause damage, you could even face the breaking problem at one point.
Some major causes of this problem include:
The improperly adjusted low limit screw causes overshifting into the spokes, causing the derailleur to move too far beyond the largest cog.
A bent hanger could also be one of the causes you may break your rear derailleur. The hanger gets bent when you are involved in a serious crash damaging your MTB bike at the same time.
Cheap derailleurs with terrible build quality could also cause breakage issue at any point and that mostly happens when you are riding a steep uphill terrain.
Other than that, if you have not replaced it for a long time, it will get old and break at any point.
Foreign debris and dust along with rust and corrosion are some other causes, the derailleur of your bike may get weakened and eventually be broken.
How to Install a Rear Derailleur on a Mountain Bike?
After your old rear derailleur stops working as it’s supposed to be, you should get it replaced with a new one.
Now, you may think that getting it replaced by a bike shop would be a good idea. But, what if we told you that you can do it yourself.
All you’d need would be to purchase a new derailleur according to the type of mountain bike you have, get some tools, and replace it.
Let’s get started with the whole process:
Tools You’ll Need to Replace the Derailleur
You’ll need the following tools:
- Philips Screwdriver – For adjusting and tightening the derailleur.
- A set of Allen keys – For removing the old derailleur and installing the new one.
- Chain tool– For de-linking the chain ideally.
- Bike repair stand – Just for your own convenience.
Removing the Old Derailleur
The very first step of replacing the derailleur is to remove the old one.
For that purpose, follow the steps mentioned below:
Put your bike on the bike repairing stand and shift the chain to the smallest rear sprocket of the derailleur.
Pull the shift’s cable end cap and loosen the pinch bolt to disconnect the shifter cable. After disconnecting, simply remove it.
Similarly, the next step involves removing the bike chain. If the chain comes with a master link or a quick-release link, then simply untuck it and remove the chain. If it doesn’t, then use the bike chain breaker to remove it accordingly.
Unthread the derailleur’s mounting bolt in the counterclockwise direction and the derailleur will start loosening. Remove it from your bike accordingly.
Installing the New Derailleur
For the rear derailleur installation, you need to inspect first that the current derailleur hanger is in good shape and the threads are not damaged.
If the hanger isn’t in good shape, replace it first before you install the new rear derailleur.
Next, simply mount the new derailleur onto the right place and start mounting the bolt clockwise, basically just the opposite of what you did earlier.
Tighten it to an extent that it gets properly adjusted.
Put the chain back on the derailleur using the chain breaker tool.
Last but not the least, put the shift cable back into the derailleur and simply pull it tight. While you do that, you should also tighten the anchor bolt, so that the cable flattens easily.
You have now finally installed a new derailleur into your bike. But, wait!
You should never ride your bike as soon as you install a new rear derailleur as you will have to adjust and tune it now.
Follow us:
Adjustment and Fine Tuning
For adjusting the rear derailleur, you will need to limit screw adjustments and that would include limiting from both high and lower ends. You can do it with a Philips screwdriver to make sure that the derailleur does not move beyond its limits.
Adjust the chain and the links accordingly and pedal the bike with your hands. Shift the gears to check whether the derailleur is working fine or not.
Go on a test ride and if everything feels smooth, CONGRATULATIONS! You have successfully installed a new rear derailleur on your mountain bike.
How to Maintain the Derailleurs?
Installing the new derailleur is one thing and keeping it maintained enough is another.
The more you clean the derailleur of your bike on daily basis the better.
So, first of all, you should know that the derailleur’s cage could collect dirt and grime easily. To get rid of it, simply use a brush that could reach the narrow areas of the cage and remove any dirt from it. You can also do it by removing the chain, but we won’t recommend it.
Cleaning the jockey wheels is also important as they tend to collect a lot of gunk and dirt while you ride your bike. Scrap all the gunk from the wheel with the help of a screwdriver and use a rag to clean it accordingly.
You should also inspect the teeth of the jockey wheels and make sure that they are blunt enough. If not, simply lube them with a standard bike lubricant and that would be more than enough. You can also replace the jockey wheels if they fail to perform efficiently.
We all know that a rear derailleur consists of 4 pivots and they require proper lubrication. We’ll suggest lubricating them as soon as you feel that the gears aren’t shifting smoothly.
Apart from that, if you see rust or corrosion on the derailleur, you’ll need to remove it. Get yourself the best bike lubricant and apply it to the corroded area. Leave it still for a while and then wipe it off. Rust and corrosion act as a termite to the bike though and it will ruin your bike. As soon as you see it on the derailleur, try removing it and if the rust doesn’t go away, simply replace the derailleur.
Conclusion: How to Install a Rear Derailleur on a Mountain Bike?
Installing a rear derailleur on the mountain bike is easy if you have the right tools available at your disposal.
Just make sure that you get the right derailleur model for your bike and install it according to the instructions we have mentioned above.
In the meanwhile, keeping the derailleur clean and lubricated will allow you to enjoy shifting gears smoothly for a long time. Not only that, but it could also reduce the chances of corrosion.
Follow the instructions and get the derailleur replaced if it’s causing noise or problems regarding the gear shifts accordingly.