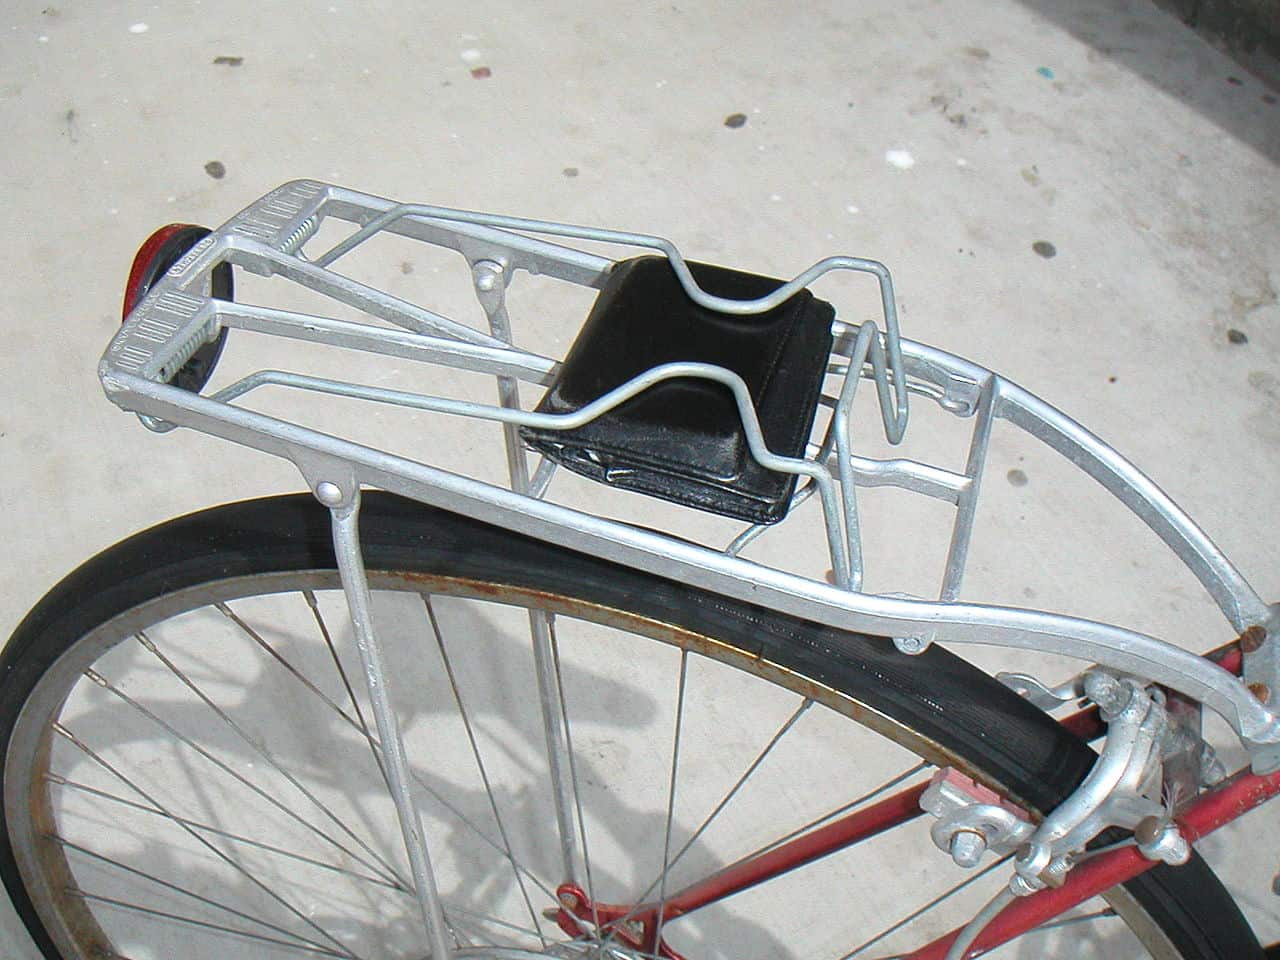
Did you buy a rear bike rack and can’t figure out how to install it correctly? No problem, we have you covered.
Here’s a detailed guide on to install rear bike racks, along with all the tools you’ll need for the job. We’ll also give you some tips and ideas to use the rear rack correctly.
Let’s jump straight to it.
Mounting A Bike Rack With P Clamps?
P-clamps are excellent when you are installing bike racks. These clamps are explicitly engineered to connect two tubes.
Where the rack legs would usually be bolted on, you’ll attach the clamp to stay stable and then screw it around the bike.
This way, you will have a tight grip that holds the rack in place without the need to use anything else. Here is why we prefer P clamps:
- They are affordable
- Sturdy
- Durable
Tools Needed
Some bike racks come with the needed tools to install them. However, if yours didn’t come with the tools, you will most likely need Allen keys, a screw drive, and a 6mm wrench to get everything tight and sturdy.
Steps
To begin with, you need to attach the brackets to the top of the seat support before it connects to the main seat post.
This should result in two brackets, one on each side, to which you can also attach the mounting struts. Then take the rack and place it in the position you want on the rear of the bike.
This will attach the mounts to the brackets more easily without inadvertently putting them in the incorrect place or position.
The P clamp has a hole that continues through the whole thing. It would help if you positioned the rack mount feet in this spot so you can push one bolt through all four holes.
You can then put a nut in the end to tighten it in place and make sure everything is tight. Use of washer is also an option is there any room left.
There are two reasons to use washers. Washers prevent the bolts and nuts from rubbing against the metal where they are tightened.
They also fill the space if the bolt/nut is too short. If there is too much space between the holes of the P-clamp, you can always use more washers to create a tighter fit that won’t allow the rack to shift laterally.
You’ll want to make sure you’ve positioned the bike rack on flat ground during the entire process.
This is important in terms of maintaining the correct angle of the rack. You can also use a smartphone app to make sure the alignment of the rack is proper.
Installing A Rear Rack Without Braze-On
Bikes that are friendly to attack a rack, you’ll typically find eyelets – braze-ons near the rear or front of the MTB (depending on where the manufacturer chose to place it). This makes it easy for the riders to install the racks of their choice.
Some bikes, however, don’t come with braze-ons, and you are wondering how to install a rear bike rack on your bike?
As we showed the instructions earlier, using P-clamps is one of the ways. Another option would be using a seat post clamp. They take the place of upper eyelets for a rear rack on bikes that don’t have braze-ons.
Tips for the Correct Installation
If you choose a rack, taking into account all the features of your bike, you should not have problems with installation. The only thing is, if there is a height adjustment, try to place it as low as possible to the ground to lower the center of mass.
The most common bike rack breakdown is shearing off the bolts that attach the struts to the frame. It is a very unpleasant situation since part of the bolt usually remains inside the hole, and it is pretty problematic to remove it from there.
Sometimes you even have to drill it out. The cause of this malfunction is a weak tightening of this bolted connection.
Even if you tighten everything properly during installation, regularly check and tighten all bolted rack connections to the bike because they spontaneously loosen over time.
The second most common mishap is when the rack or other elements of the bike rack break. If it is steel, then there are no particular problems. Using a welding machine, we can weld the damaged part.
Well, in the case of aluminum and titanium ones, you will most likely have to buy a new one (although it is tough to break a titanium rack).
When choosing a rear rack, do not forget about the diameter of the bike’s wheels. There are models with the ability to adjust the height of the racks. The instructions indicate which wheel diameter they are suitable for diameters.
How You Can Use a Rear Bike Rack
Anyone who begins to ride more than a few hundred kilometers a month on bike trips and commute on a bike starts to understand that riding with a backpack over their shoulder is not always convenient.
Your back gets very tired from a heavy backpack because it hangs on your spine, which negatively affects your health. Hence, using a rear bike rack is a great solution.
Tips for Buying a Rear Rack
When buying a bike rack, for example, at a market or in a store in your city, you should take your bike with you. This helps with the choice since you can immediately measure everything on the spot and determine which trunk model will fit your bike.
At the moment, many bike shops offer services for manufacturing homemade bike racks.
There are several advantages to doing this, one of which is that it will fit neatly to your bike’s geometry, making it fully welded. Plus, you can decide which elements are worth strengthening and which ones you can save weight on.
When choosing a bike rack, if necessary, immediately pay attention to the presence of a clamping bracket, reflectors (or unique places for their installation), etc.
FAQs
Can you put a rear bike rack on a mountain bike?
Yes, installing a rear bike rack on a mountain bike is possible. The issue is that if the cycle is a full-suspension model, the option of installing it decreases massively due to the interference of the struts with the shocks.
What is a braze-on on a bike?
A braze-on is a term used to describe permanently attached parts to the bike. In installing rear bike racks, braze-on is referred to the eyelets that come on some bikes.
How do you install a rear bike rack without eyelets?
If the bike doesn’t come with eyelets, the best option is to use P-clamps and attach the bike rack legs to the clamps.
Conclusion
After reading this article to the end, you can make your own decisions on how to choose and install the right rack for your bike.
Firstly, you should select racks based on your bike’s model, which has all the necessary attachment points. Plus, it’s worth deciding how you are going to use it.
For example, a steel rack with protection against the ingress of cycling trousers into the wheel spokes is well suited for long cycling trips. And if you are not riding very far, it is better to use aluminum models.
You can install a small front rack with a basket for various little things on a children’s bike. Installing a rack (front or rear) is also not difficult. It is enough to know its features and installation methods.


