Are you just taking your first leap on your two-wheeled adventure and want to know how gears work so you can get a handle on your gearing range instead of just “winging it” when gear selection becomes more necessary?
You are in the right place. This article will hopefully help clarify any confusion or answer any questions that might come up.
But before we jump into ” how to shift gears on a mountain bike”, a better understanding of what mountain bike gears are, is essential.
What Are Mountain Bike Gears?
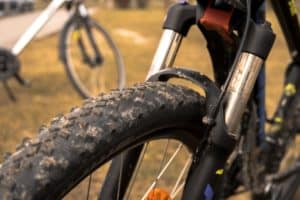
Gears are the “speeds” of your bike. They allow you to change the speed at which your rear wheel rotates, to ascend or descend hills or terrain variables more easily. Gears are typically controlled by a derailleur attached to the rear wheel.
There are two main gears on your bike, usually referred to as “high” and “low” gears. The high gear is typically referred to as the granny gear, while the low gear is called the big ring or the bailout gear.
If you are new to mountain biking, you will no doubt have heard the term “gear inch”. This is a term that refers to how many inches of pedal rotation is required to rotate the rear wheel in one full rotation.
The gear inch measurement of a bike’s gears is determined by multiplying the chainring size with the cog size.
So for example, a standard double crankset on a mountain bike with 26” wheels would have a gear inch measurement of 10” x 26” (26″ = wheel diameter; 10″ = x 2 chainring size). This means that you can travel 100 feet with a pedal rotation of just ten inches.
The higher the gear inches are, the slower your bike will go but the easier it will be to get up hills. On the other hand, if you are traveling downhill at high speeds, you may want to reduce your gear inches.
In this case, the lower the gear inches from your bike’s largest gear to your smallest will cause your bike to go faster.
The design of a bicycle gear system allows the rider to change speed in either direction as needed according to where they wish to travel.
How To Shift Gears on a Mountain Bike
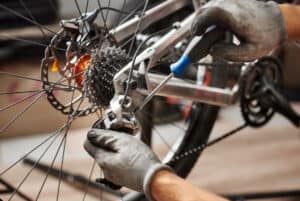
To shift gears, you need to change the number of teeth on your rear cassette or derailleur, which is usually controlled by a thumb and forefinger device attached to the brake levers.
There are several ways to shift gears. A common way is simply to “click” through the gears with your fingers as you pedal.
This is called shifter shifting. Another method of shifting gears is called “cable-pull” shifting. This consists of pushing the derailleur to a new position and then pulling it back to go back into the previous gear.
Shifter Shifting is typically used when doing long climbs as it allows you to select the gear ratio with very little effort time, whereas cable pull-shifting requires more physical energy and therefore usually applied lower gears to maintain momentum.
Cable pull shifting offers various benefits that are highly sought after by riders who are tired of constant handwork. It eliminates the need to lug your gears up and down in a race or on long climbs. It also allows you to put the bike in “overdrive” or high gear while still climbing at a moderate speed.
There are two ways to shift gears: chain shift and derailleur shift.
These shift methods have advantages and disadvantages depending on the type of riding that you are doing.
Chain Shift
The chain shift is easier to master but requires more muscle power and pedaling force than the derailleur shift with equal gear ratios. On the other hand, it allows you to go faster if climbing while eliminating shifting friction.
Also, if you are trying to maintain momentum or speed during a race, it will keep your gears from engaging and possibly cause a loss of speed.
To do it, simply push the rear derailleur down and towards the chain, then back up over the chain and under the cassette.
It is best to work on both sides of your front derailleur to keep your bike in balance. You should practice this in an empty parking lot to ensure that you do not crash while shifting gears.
Derailleur Shift
Meanwhile, the derailleur shift is more difficult to master, but it allows you to select more gear ratios than the chain shift and shift faster with less effort.
If your riding conditions are very steep or loose, it will be beneficial to use this method of shifting because it helps you maintain momentum.
Also, when climbing steep hills on a fixed-gear bicycle, the derailleur shift is ideal because it allows you to select more gear ratios for each rotation of the crankset.
To execute this shift, simply pull your derailleur in the opposite direction of your desired gear. To move to a smaller gear, push the shift lever up; to go to a larger gear, push the lever down.
It may help if you push each side both ways at different times while going uphill or on rough terrain to ensure that you stay on track and do not lose momentum.
Understand The Different Parts of Bike Drivetrain?
Gears are one of the most important innovations in biking. They make cycling a more challenging and fun activity.
Every road bike has a drivetrain that is composed of gears, chains, cogs, derailleurs, shifters, and brakes.
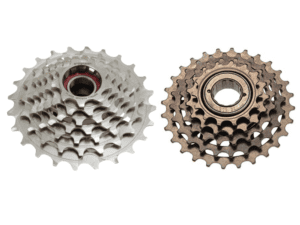
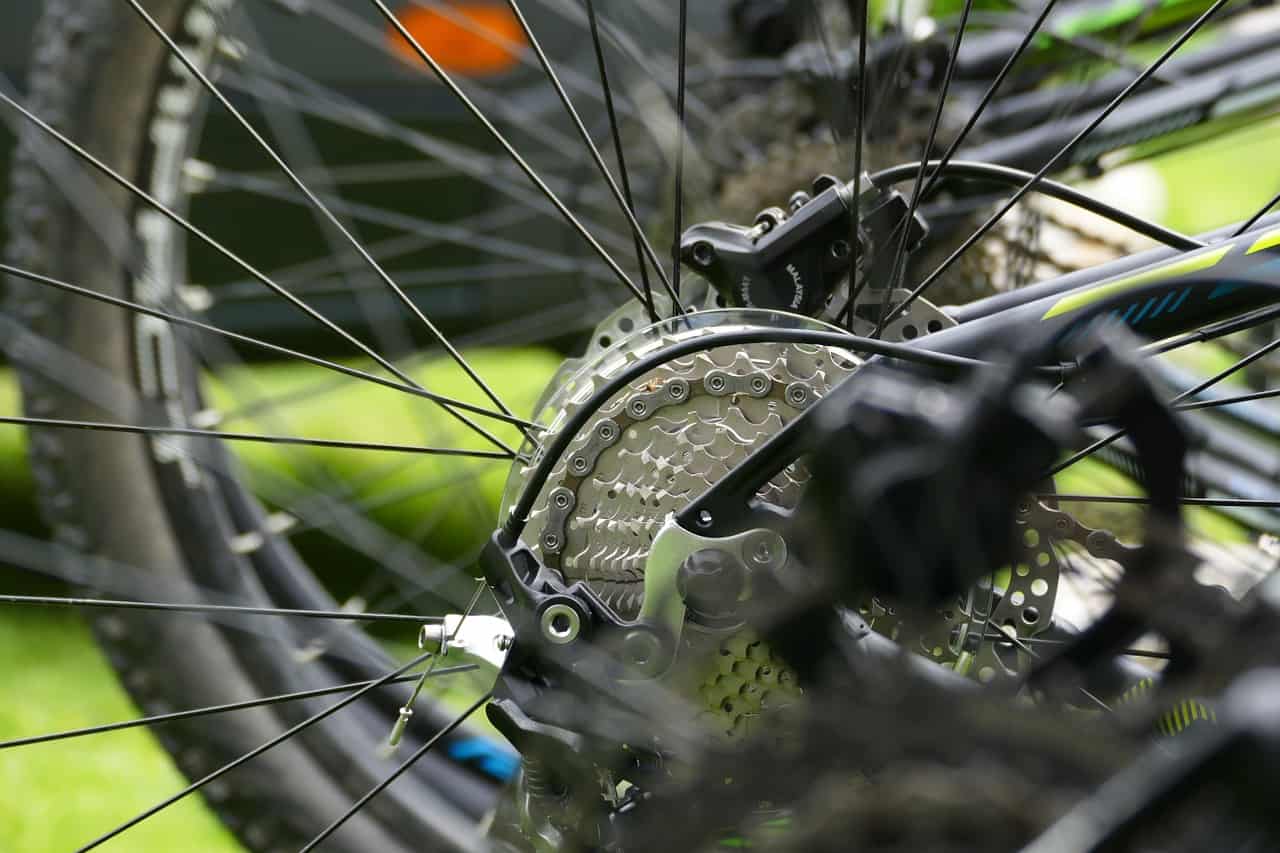
Cassette: A cassette is a device that allows you to change the gear ratio of your bike. A cassette (rear gears) has two sprockets and a chain with one or more rings attached. The cassette is connected to your crankset and moves in or out as you shift gears.
Moreover, you can move the front chainring within the cassette to change from one sprocket on the rear wheel to another.
Crankset: The crankset, also known as the pedals, or crank arms, is what makes your bike move forward. The two most common types are 3-pin and 2-pin.
2-pin cranks: The 2-pin cranks have a hole in the middle of the pedal axle where you thread the pedal spindle in. The threaded part is an 8mm diameter bolt that holds both sides of the pedal together.
3-pin cranks: The 3-pin cranks have the same principle, but the pedal bolt is 10mm in diameter. This means that you can use either a 9mm or a 10mm axle spindle. You can’t do this with a 2-pin crank.
Cogs: Cogs are plastic pieces inside your cassette and chain that are used to change gears on your bike. They are located between your chainrings and will go with one or more chainrings on your crankset.
Derailleur: The derailleur is a mechanism that shifts the gears on your bike by moving the chain from one position to another. It knows how many teeth there are in the cassette and will move the chain accordingly.
Shifters: Shifters are knobs or switches that allow you to shift gears by moving them forward or backward. The shifter is located on your handlebars and has two positions: one for shifting up and one for shifting down. Shifters come in two forms namely direct-pull and push-pull.
Direct-pull: Direct-pull shifters use a cable to move the derailleur. They work better if you use a derailleur with a longer cage.
Push-pull: Push-pull shifters direct the chain by pulling a chainring or cog backward. These are good if you have larger hands and do not want to get tangled in cables.
Brakes: Larger, more powerful brakes make for better-stopping power, especially for beginners.
So now that we’ve covered all these terms let’s look at how they make up bike drivetrain.
The drivetrain, or the assembly of components that transfers your pedaling into forwarding motion, is the heart and soul of your bike.
While some bikes have multiple chainrings, it is not necessary to understand them to find out how gears work, but knowing how they function will help you determine what type of gearing you need and want.
If you’re just starting, the rules are simple:
1. Look for a bike with as few gears as possible. Low-end bikes have one or two chainrings, while high-end bikes have three, four, or even five chainrings.
2. Avoid using a mountain bike with a triple chainring drivetrain (three consecutive chainrings). It is better to purchase a bike that goes from 1 to 9 cogs and uses either a derailleur or cassette system for shifting.
3. Most mountain bikes have a double chainring in the front, and the rear is a cassette system under the crankset.
4. Avoid using bikes with thin wheels, low gear ratios, and/or a triple chainring drivetrain. This will limit you from riding on smooth terrain and hamper your learning of the mountain biking skills required to move on to intermediate and advanced-level bikes.
The same goes for low-end bikes such as BMXs, which offer the lowest quality parts of any bike on the market.
5. Know that the rear of the bike is most susceptible to damage when a front wheel is hit, either due to falling or loss of traction.
6. A lower part of your bike such as the fork that goes through your legs will absorb more shock than your seat post when you fall. So be sure to watch where you’re riding in case you lose traction and lose control, as this could be fatal.
Bike Gears Explained
Additionally, mountain bikes have a wide range of gears as well. The main difference is in the number of gears and the chainring sizes between low-end and high-end bikes. The explanation for this is simple: more gears allow you to spin your wheels faster.
This gives you more independent control of your ride, which is supposed to be one of the main reasons that you’re buying a bike in the first place!
Low gear
Simply known as the easy gear, it is the gear with the largest number of teeth. By shifting here, a steep climb is way easier. The advantage of this gear is that it’s more convenient to pedal and you’ll have a high cruising speed.
However, if you want to go really fast, you should use your middle and high gears. That said, having good low gears also makes pedaling easier when going downhill. To downshift, just push the lever toward the ground.
Middle gear
This is the middle gear with numbers that match the number of teeth on your front chainring. The middle gears give you a good balance of pedaling and speed. The middle gear is also known as the optimal gear and is perfect for climbs or flat terrain.
To downshift, move your lever to any position between 1 and 3. If you’re having trouble changing to the middle gears, try moving everything backward until you’re on it.
High gear
Often described as the hardest gear, it is the gear with the smallest number of teeth. When shifting to this gear, you’ll have little resistance from your bike chain and pedals. This makes pedaling a lot easier when going uphill.
If you have to do a lot of uphill cycling, this will be your favorite gear. And once again, like low gears (above), good high gears mean you can go faster on downhill runs while pedaling with ease.
Frequently Asked Questions
Can you downshift from 5th to 1st?
Yes, it is possible to downshift from 5th to 1st. All you have to do is hold your lever in the 5th position, without pushing it up or down. Then, shift the rear derailleur to the smallest cog.
What gear should I bike in on a flat road?
The right gear for a flat road depends on how much effort you’re willing to exert. It is not the speed that you should focus on when biking, but the amount of energy you have to put in to achieve a certain speed.
Should you change gears while pedaling?
You should change gears while pedaling if you need to go uphill or downhill. You must change your gears only when needed, especially if you’re riding up a hill.
Getting off your mountain bike to change gears can result in having to walk or ride slowly back down the hill due to how much it slows you down.
Can I ride a mountain bike without shifting gears?
Though you can ride a bike without knowing how to shift gears, the chances of having a more responsive and enjoyable ride are much greater when you know how to do so effectively.
Conclusion
Now that we’ve covered all the technical terms, you should have a clearer idea of how to shift gears on a mountain bike. Knowing how to read your gears can help you ride more finesse, have better control over your ride, and even make it safer for you on the road.
You may check how-to videos online. Several websites have tutorials on how to do mountain biking techniques.
As a beginner, don’t be afraid to experiment with your bike gears. It may take you some time to get used to them, but before you know it, you’ll become a pro and be riding your trails in no time.